Host WordPress on AWS ECS using Fargate

13+ Years of experienced as Full Stack Developer. Also worked as architect for building solutions and product to help for automation. Solution-oriented and hands-on technical utility player. Having experience of more than 4 years of experience in E commerce and finance in each domain. Experience in having driving business automation, marketing using technology. Strong follower of open source technology. Used PHP, Python, AWS and Angular as technology stack to build product
Hello Devs,
In this blog I'm going to cover how to host WordPress websites on AWS ECS service using AWS Fargate. Let me tell you why this is needed and why not to use EC2 for hosting WordPress.
Few days back I was working with my friend to enhance the performance of the WordPress website. He was facing timeout errors frequently due to memory exhaustion. Reason behind this is he has configured cron job ( PHP scripts ) which was running every 5 minutes and eating more memory due to this EC2 was getting dead state and getting timeout. After this problem I have done some research and talked to a few AWS community builders then concluded to host WordPress site on ECS cluster where can run more than one task can accommodate separate infra for running main website and another task can run separate infra for running cron jobs. In this way load can be divided and easily manageable. Both activities will not disturb each other.
This is the reason for selecting AWS ECS service over EC2 to enhance performance and be more resilient.
Lets understand first perquisites:
Docker - Docker helps you to separate out your application from infra so that you can deliver the final product faster. This is exactly similar to making 2 minutes of instant noodles. While cooking instant noodles we have to open the package and put it into hot water and then after 4-5 minutes it will be ready to eat. An Exactly similar Docker container is the instant noodles package which we have to just configure to infra and run apps. More details can find here https://docs.docker.com/get-started/overview/
ECR - AWS ECR ( Elastic container registry ) is an AWS service which enables us to keep a registry of docker images. We can store any docker image and pull inside AWS services whenever it requires.
ECS - AWS ECS ( Elastic container service ) is a service where you can deploy any docker image or host any code inside a container and enable us via 80 or 443 port to view in the browser using ALB ( Application load balancer ). This is like boiled water where you can put multiple instant noodle packets similarly in AWS ECS cluster can add more number tasks which run on each container. More details can find here https://aws.amazon.com/ecs/
AWS Fargate - help you to focus on building applications without managing servers. AWS Fargate removes the operational overhead of scaling, patching, securing, and managing servers. AWS Fargate is an instant noodle masala packet which removes our headache of making noodles tastier. More details can find here https://aws.amazon.com/fargate/

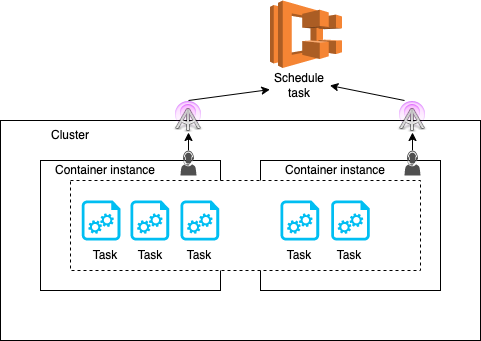
AWS ECS components :
Clusters
Service
Tasks
Task definition
Container Agent
Let's understand what to do.
Step 1 : Create ECR entry in AWS console. Go to AWS console -> ECR -> Create repository -> Click on Create
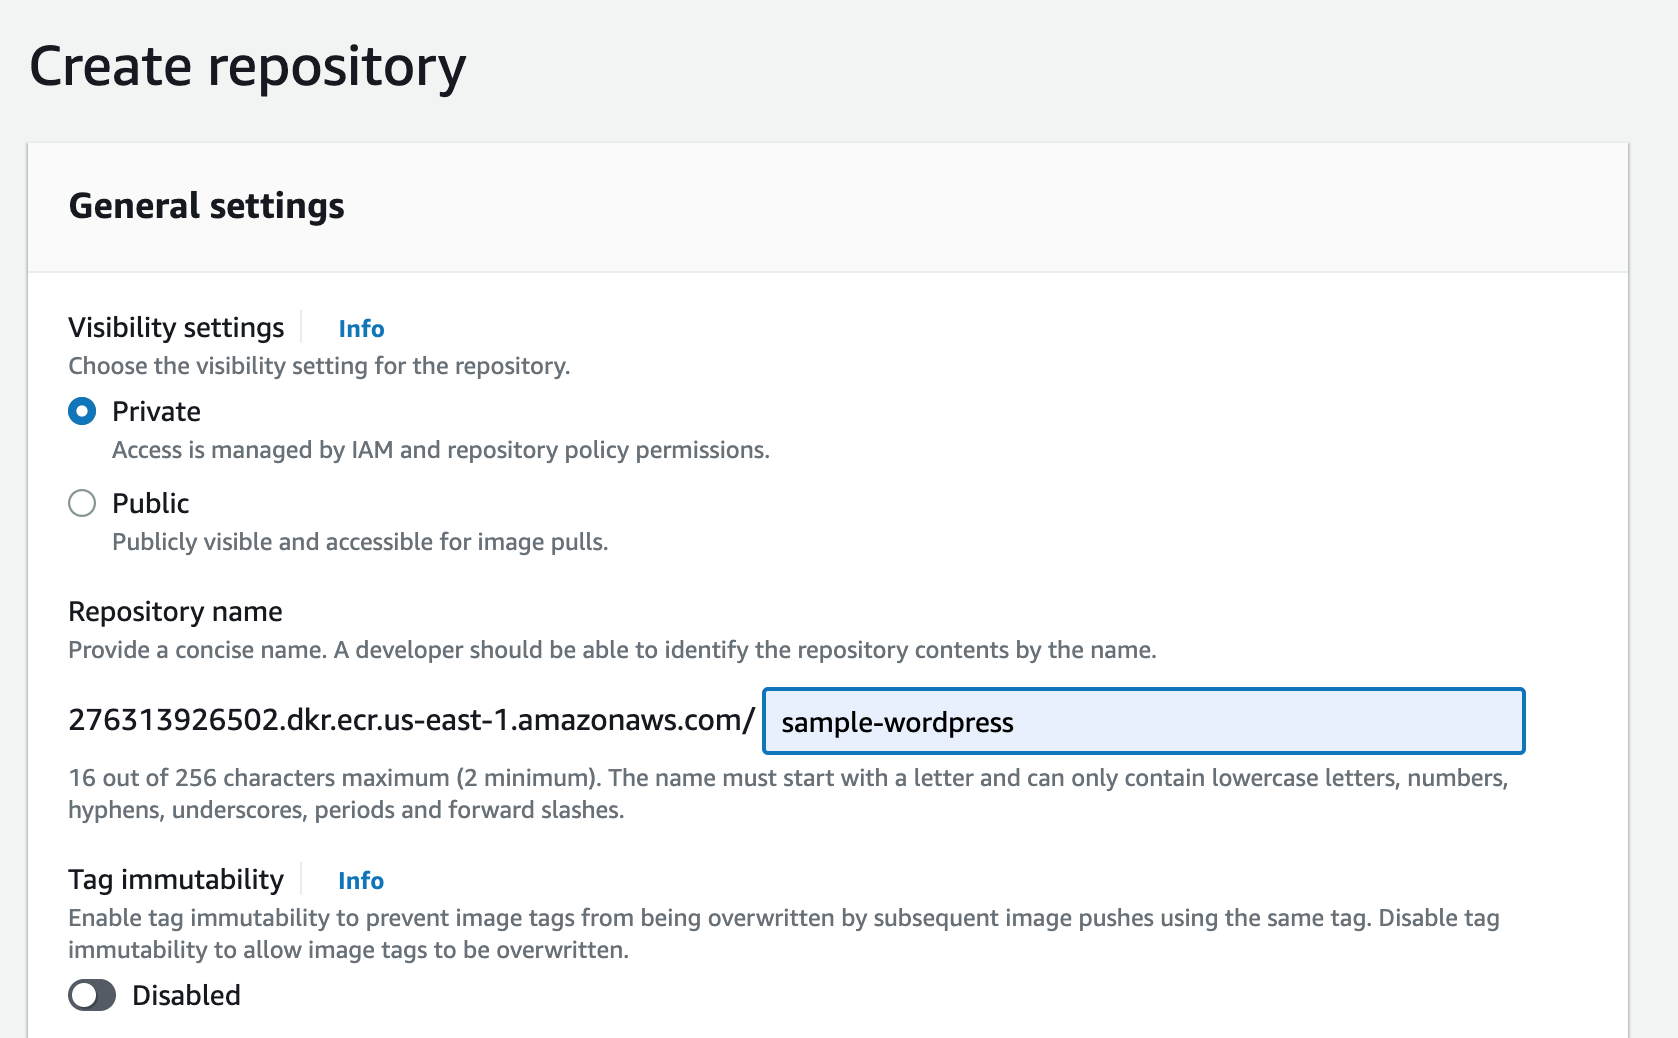
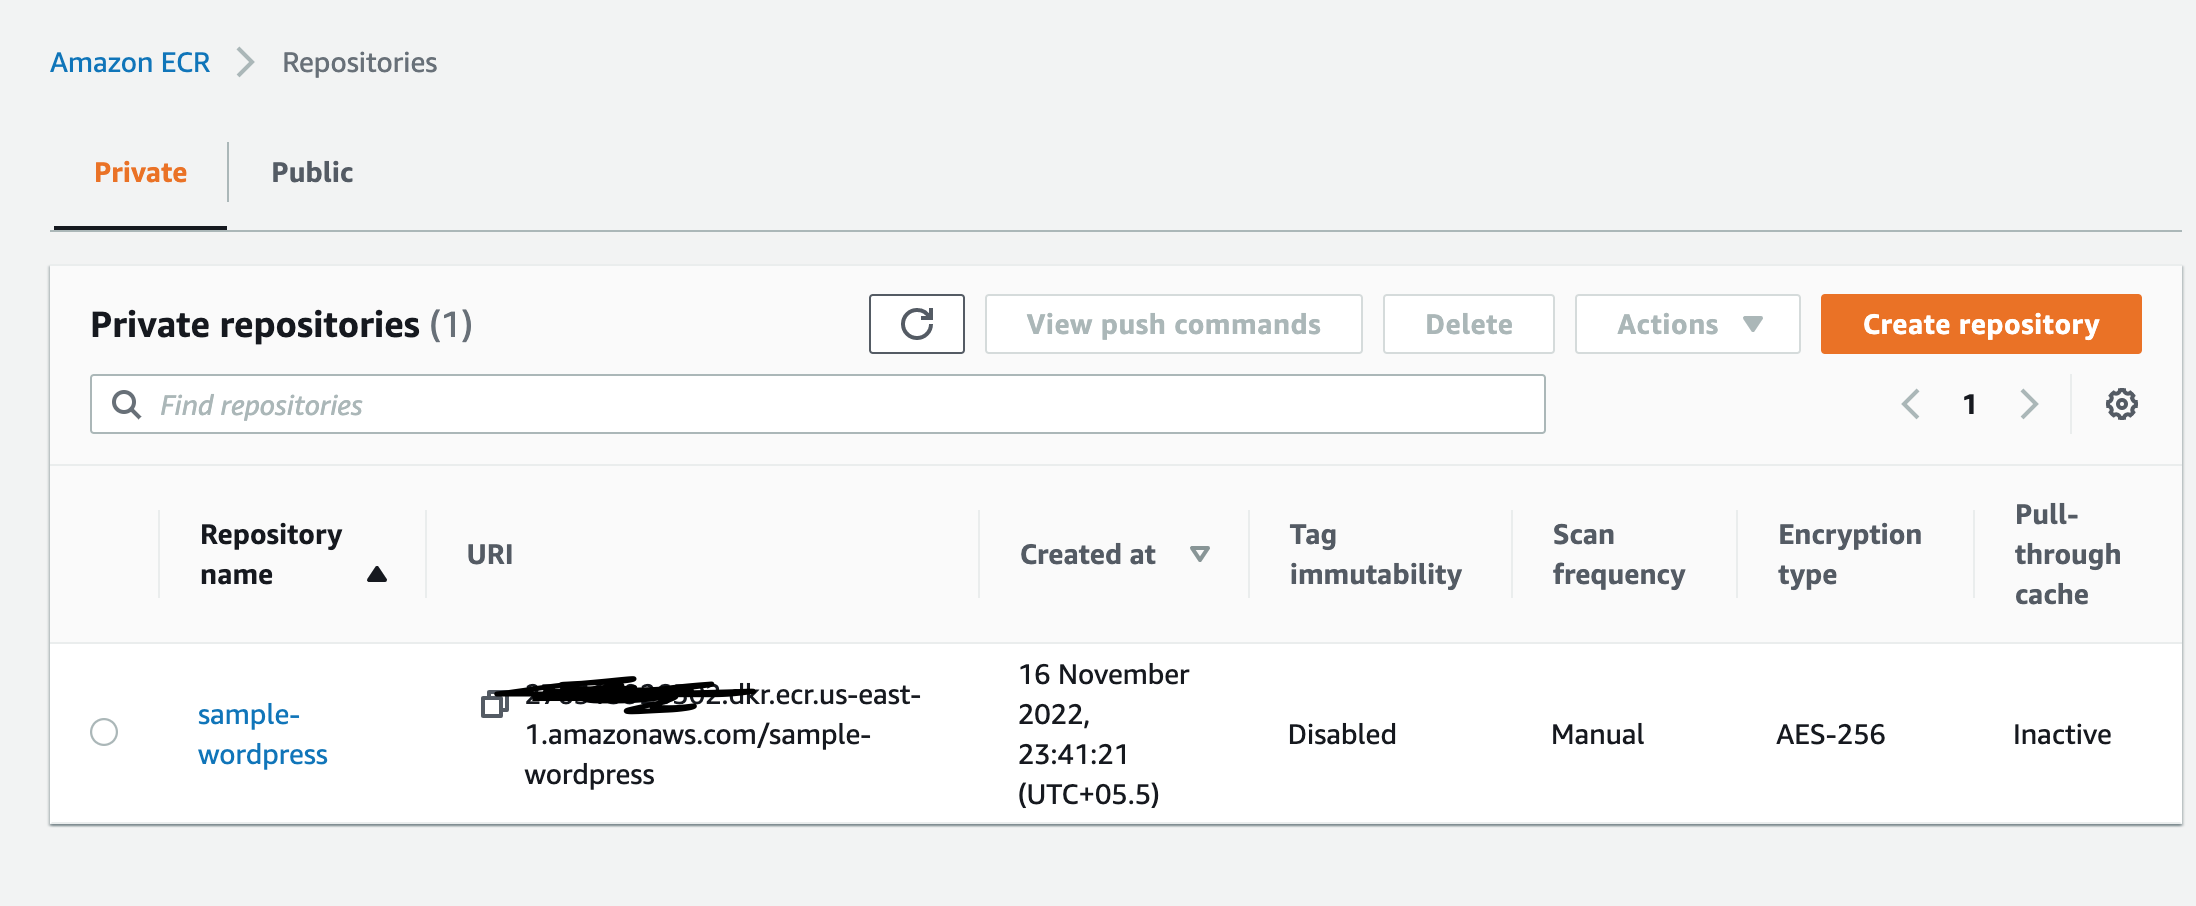
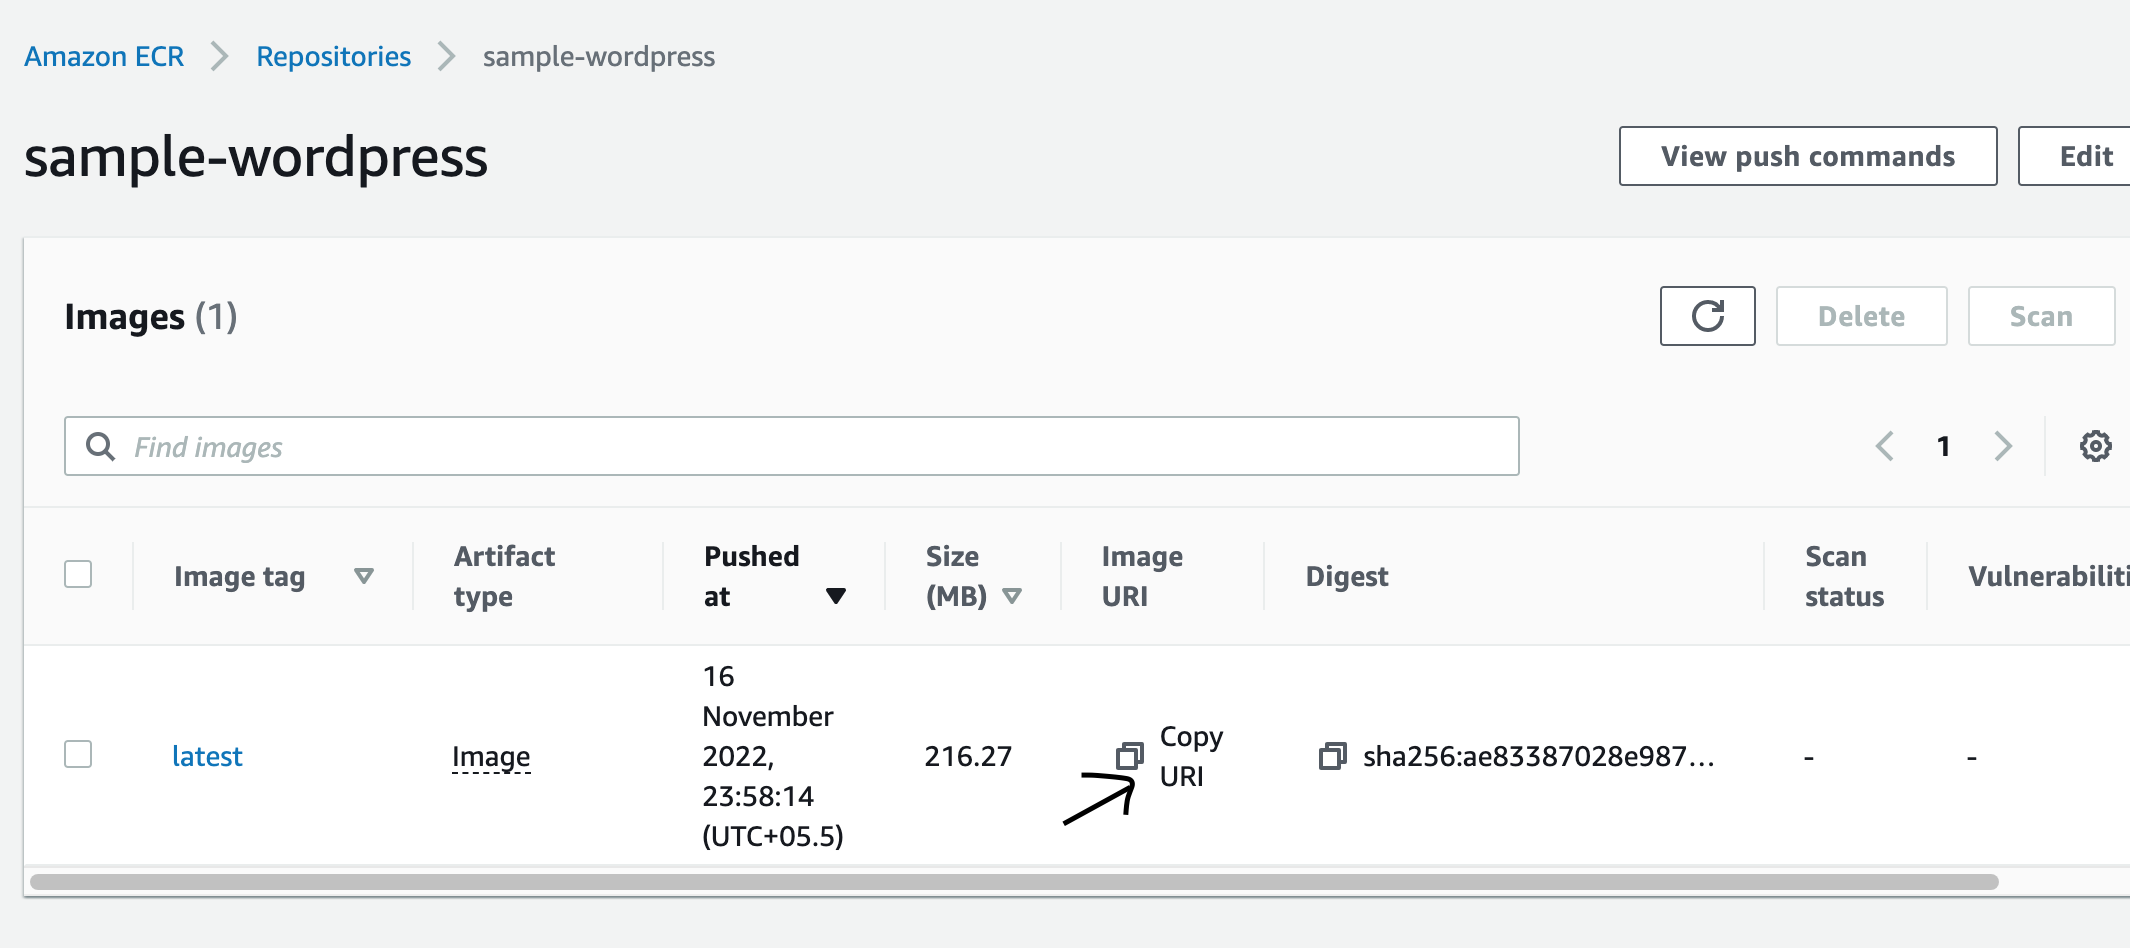
Once it gets created click on "View push commands" as shown below image.

Step 2: Run aws configure command on your terminal if AWS credential is not configured in your macOS or Linux machine. Make sure AWS IAM users which are going to use it should have access to ECR. Then following command
aws ecr get-login-password --region us-east-1 | docker login --username AWS --password-stdin {ACCOUNTID}.dkr.ecr.us-east-1.amazonaws.com {ACCOUNTID} - this will be your AWS account ID.
Output will be like :

Step 3: Get Docker image from official docker page https://hub.docker.com/_/wordpress. Run this command docker pull wordpress make sure your Docker desktop is installed and running on your machine.
Step 4: Push image to ECR. Run this command docker tag wordpress {ACCOUNTID}.dkr.ecr.us-east-1.amazonaws.com/sample-wordpress:latest then docker push {ACCOUNTID}.dkr.ecr.us-east-1.amazonaws.com/sample-wordpress:latest After this command docker image will be available under AWS ECR. Copy this URI from the ECR console.
Step 5: Go to AWS Console -> ECS -> Create custom cluster
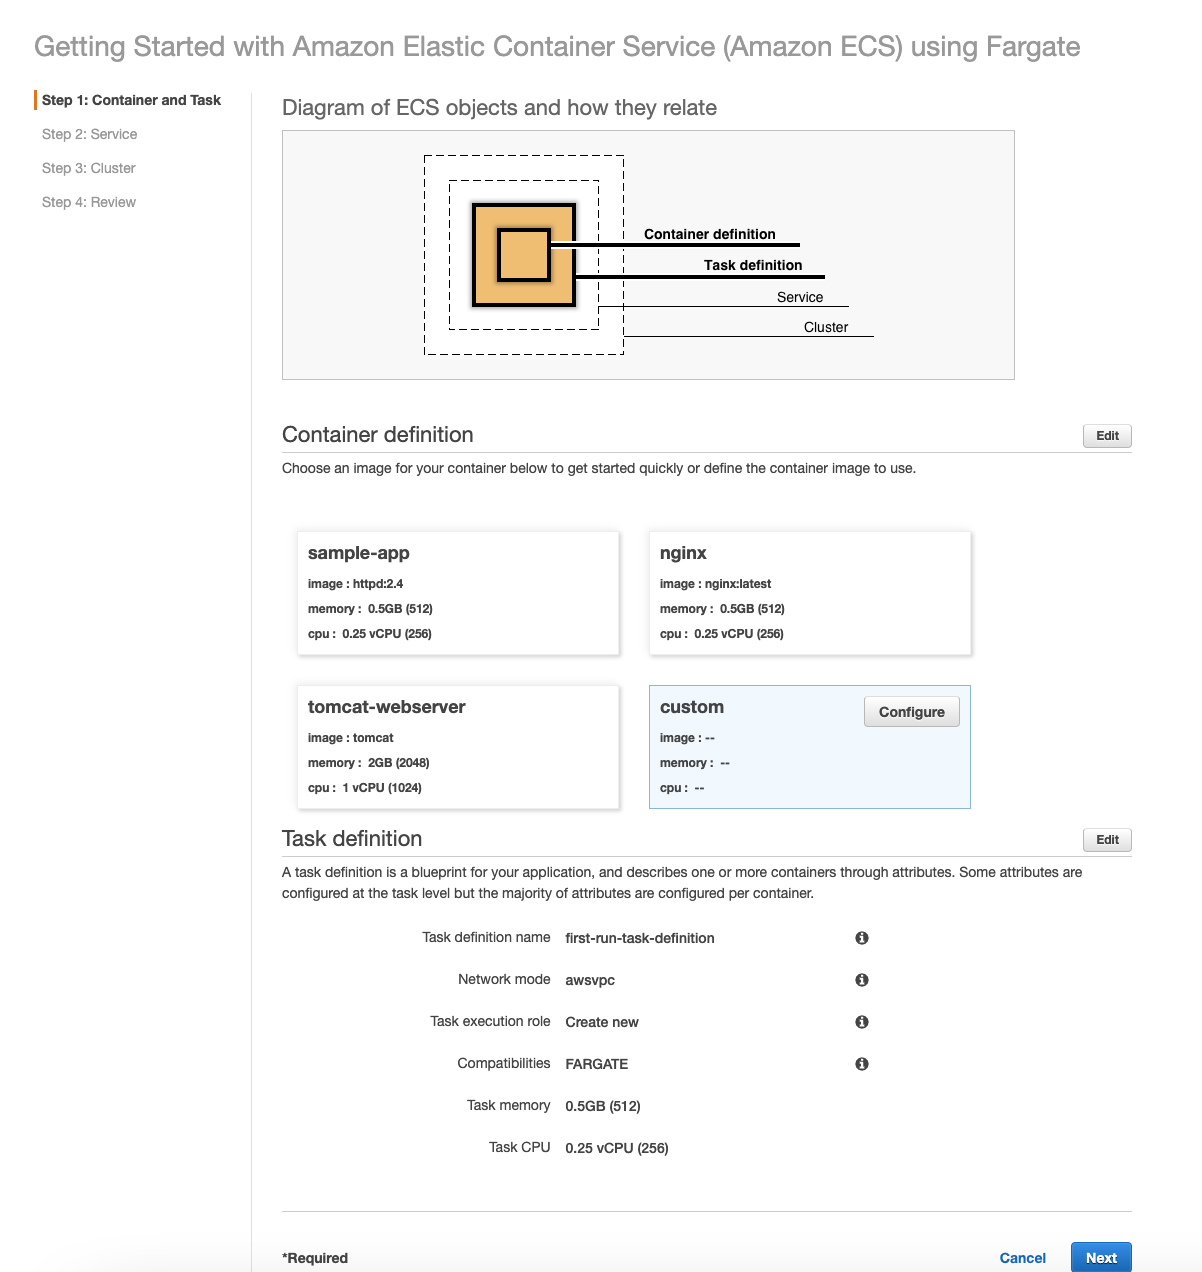
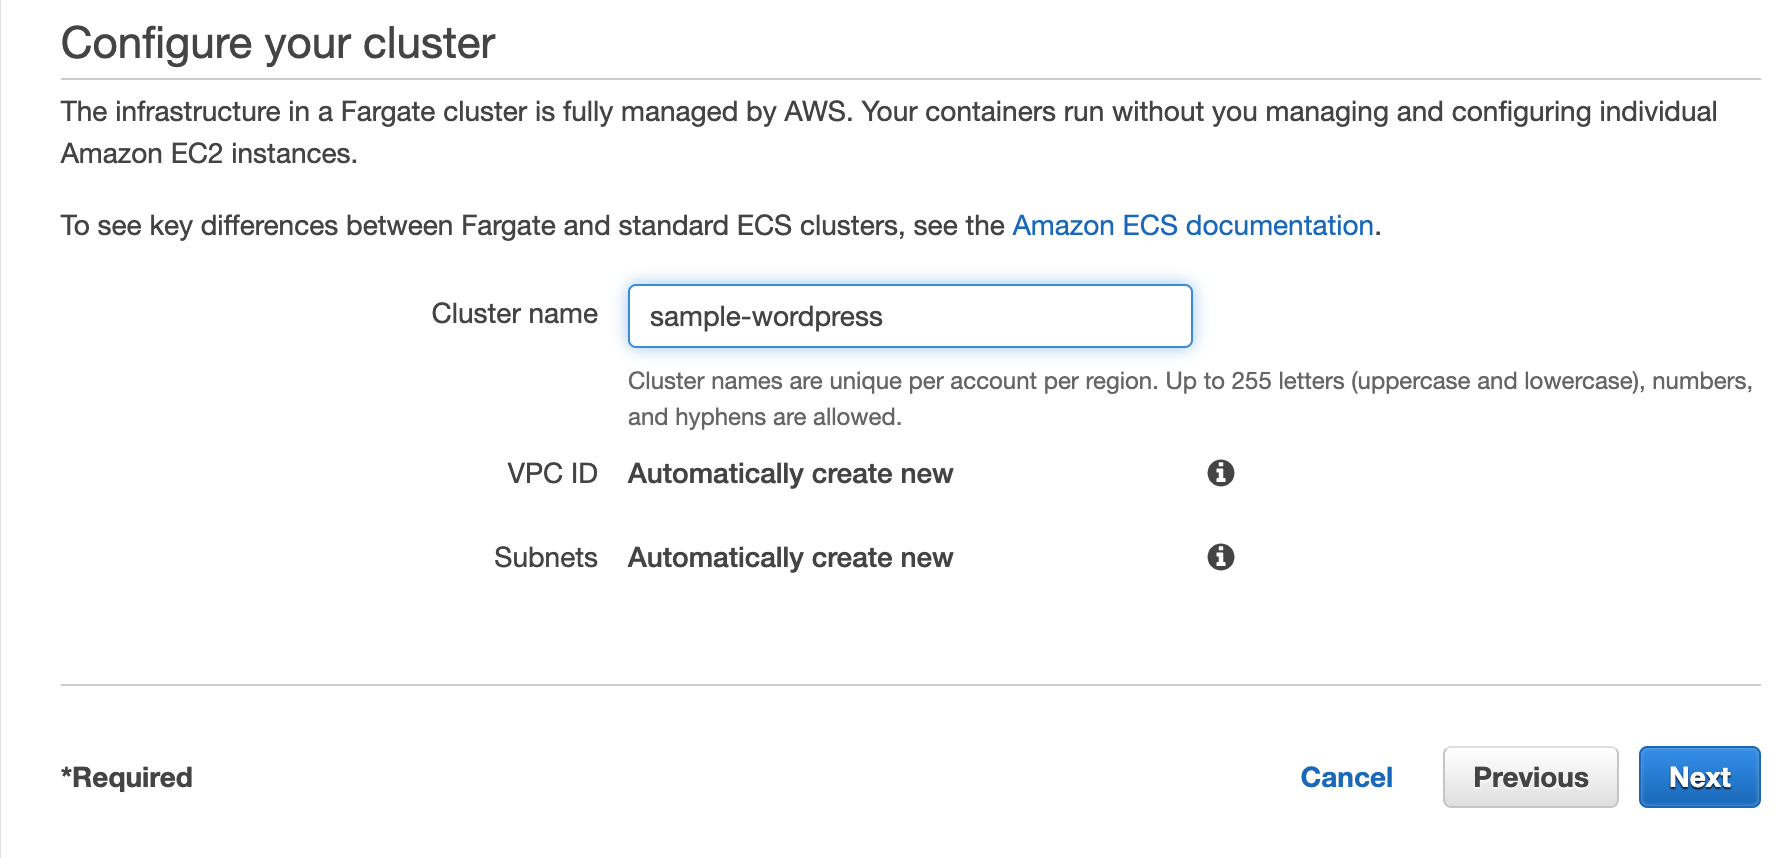
Click on configure and paste the value of URI to the second field. Give the name to cluster as "sample-wordpress" and enter 80 port values. Other configurations are optional based on use case basis.
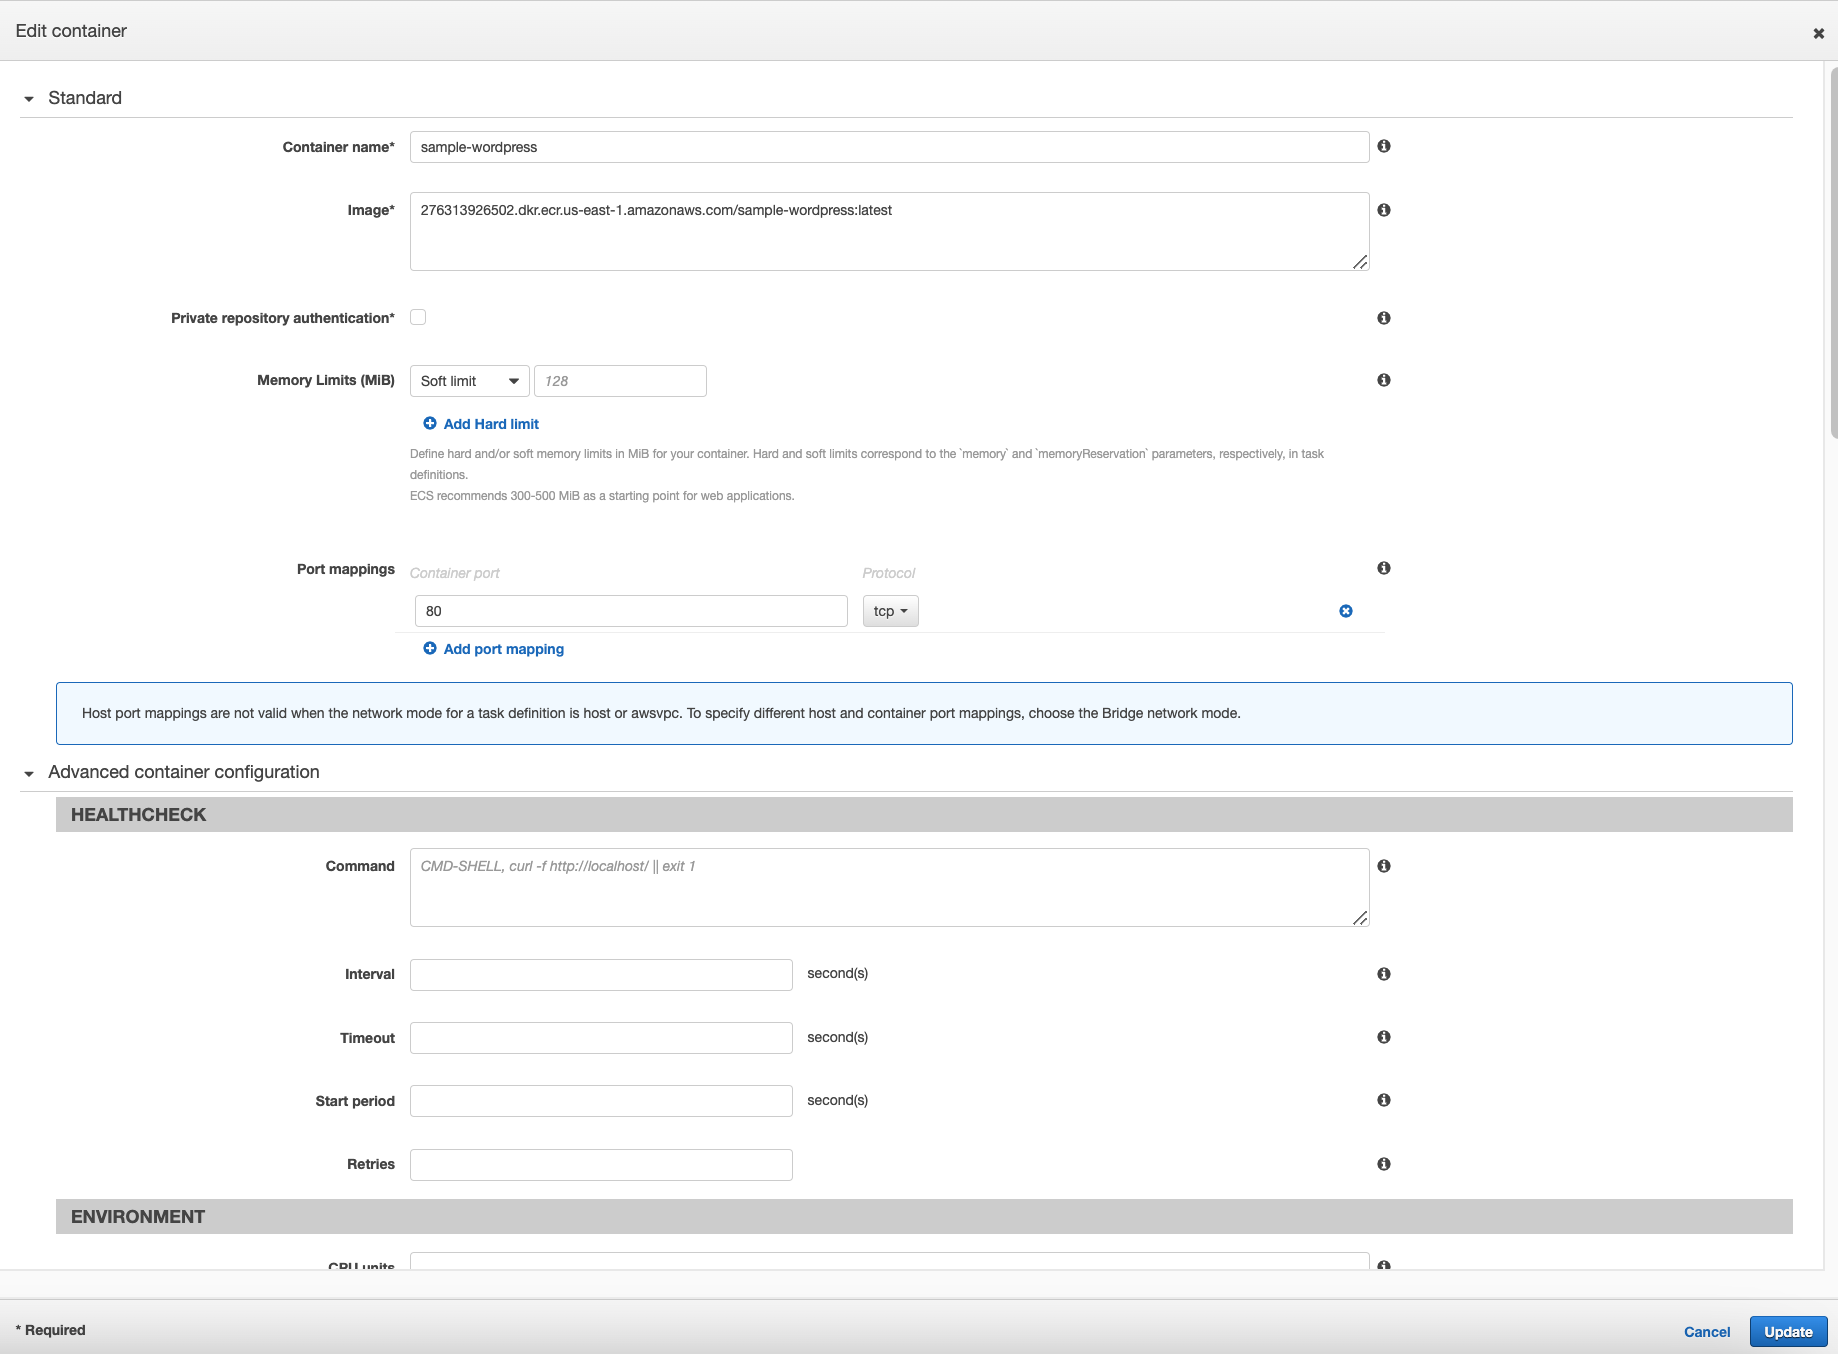
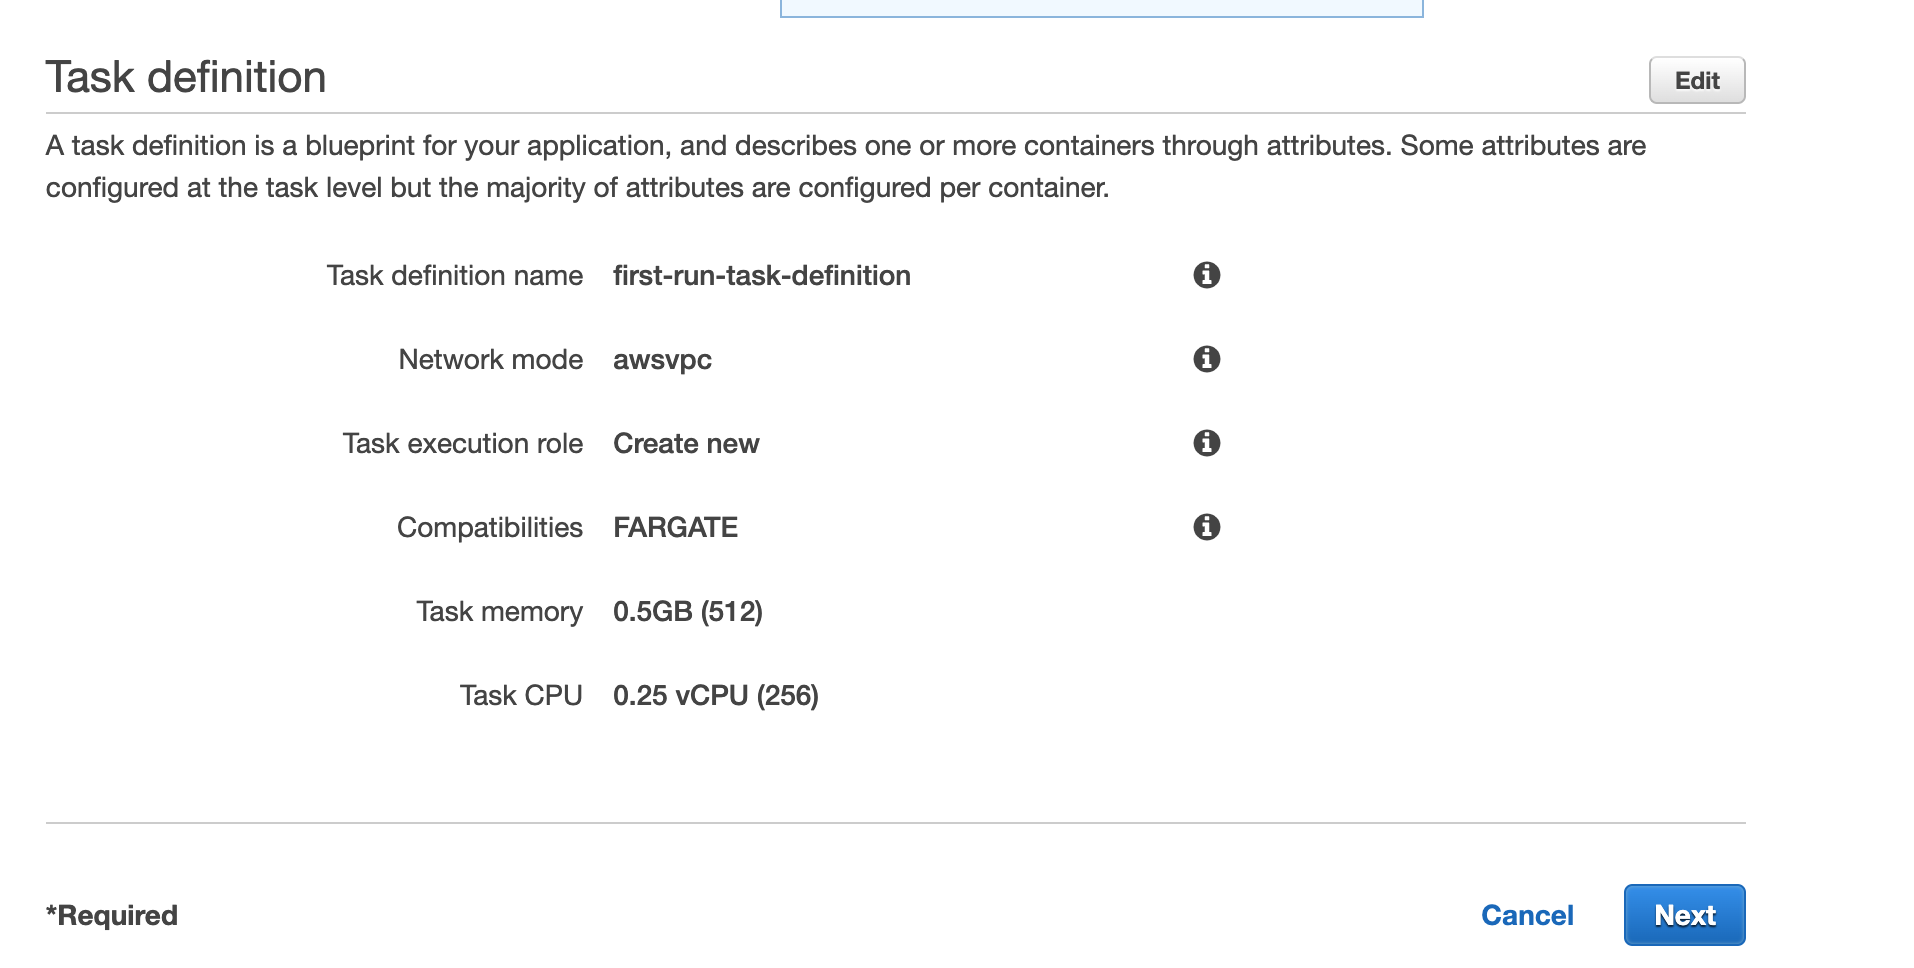
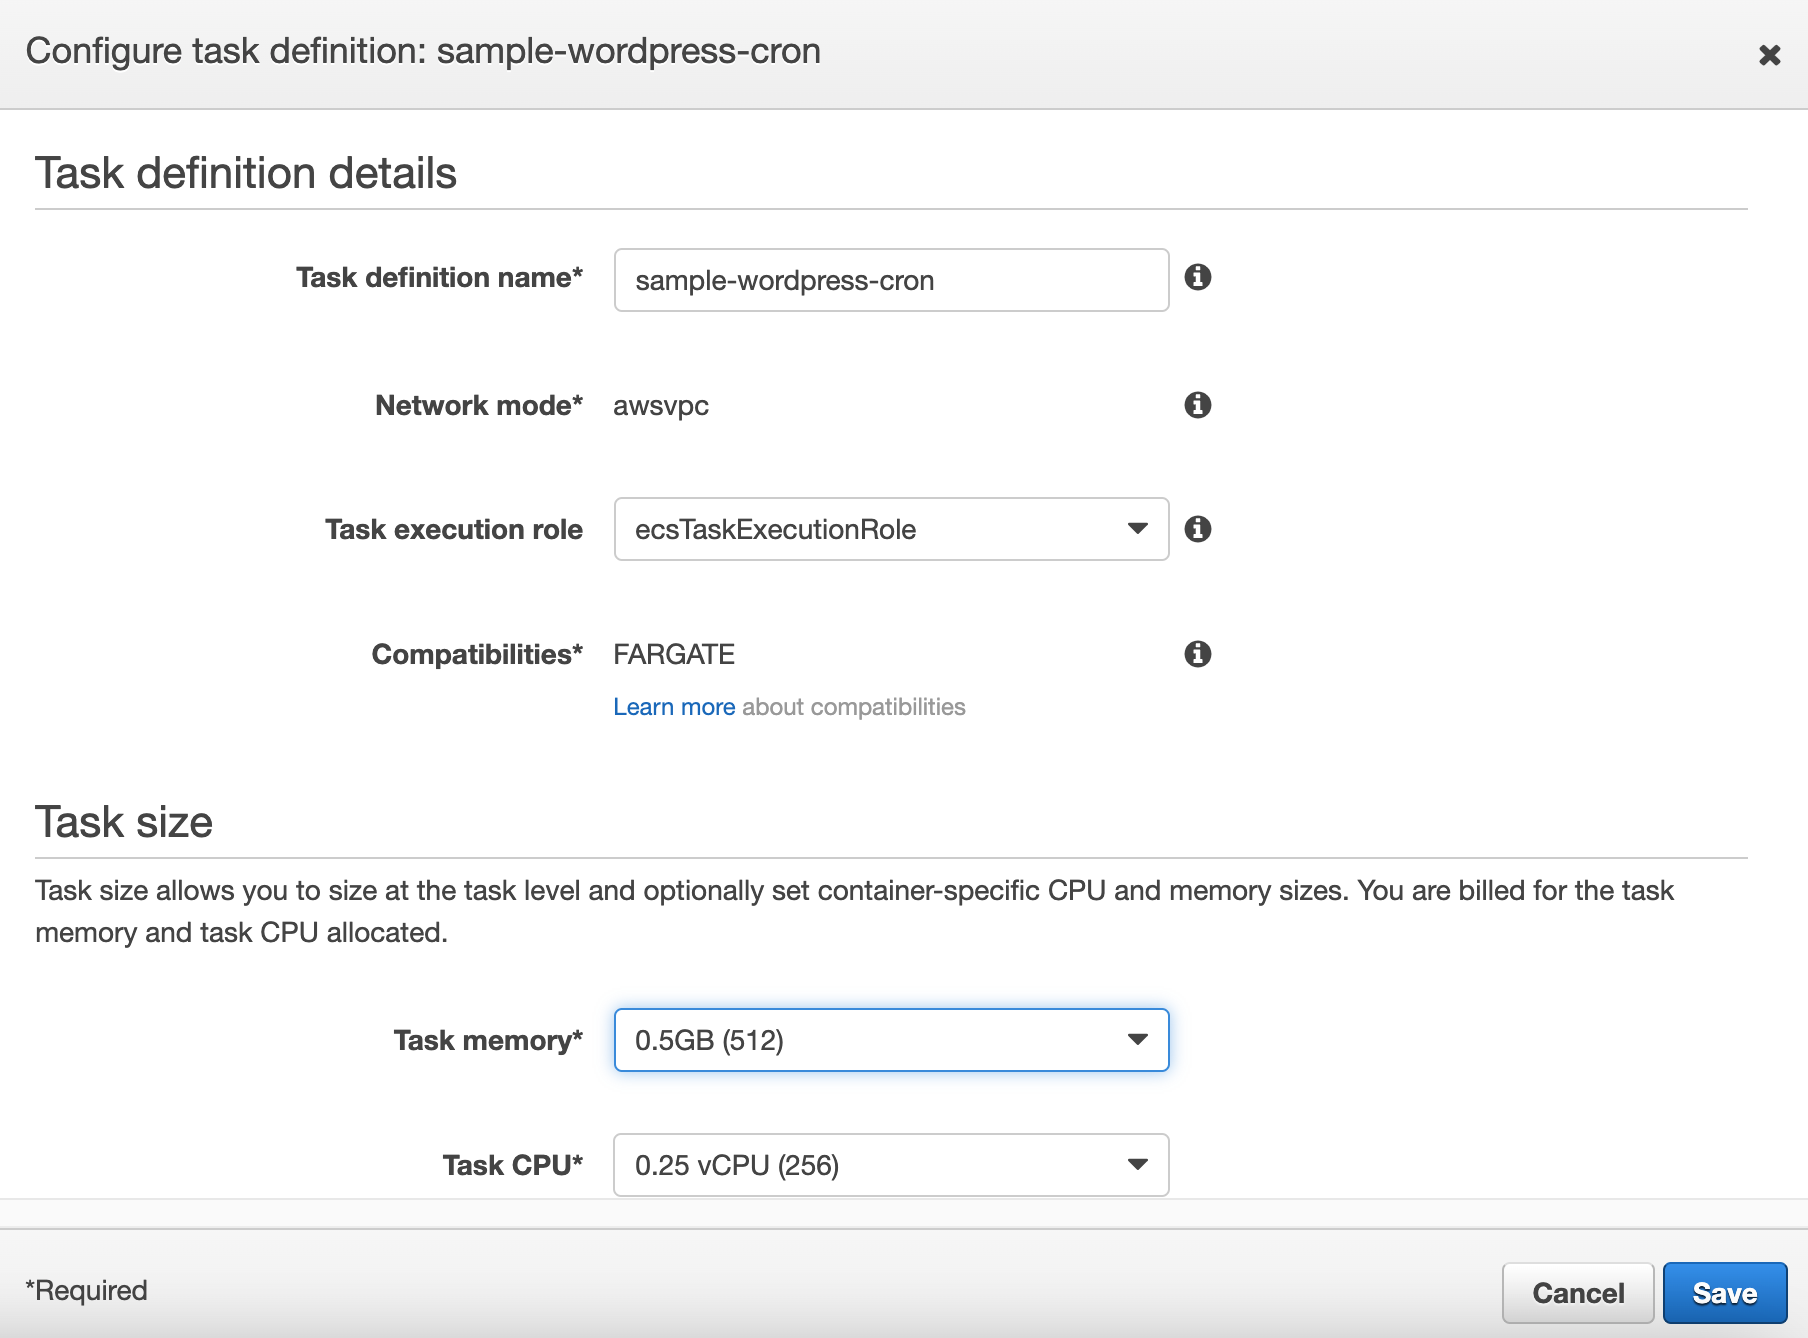
Click on edit if any change needs to be done like name of task definition, memory, cpu etc.
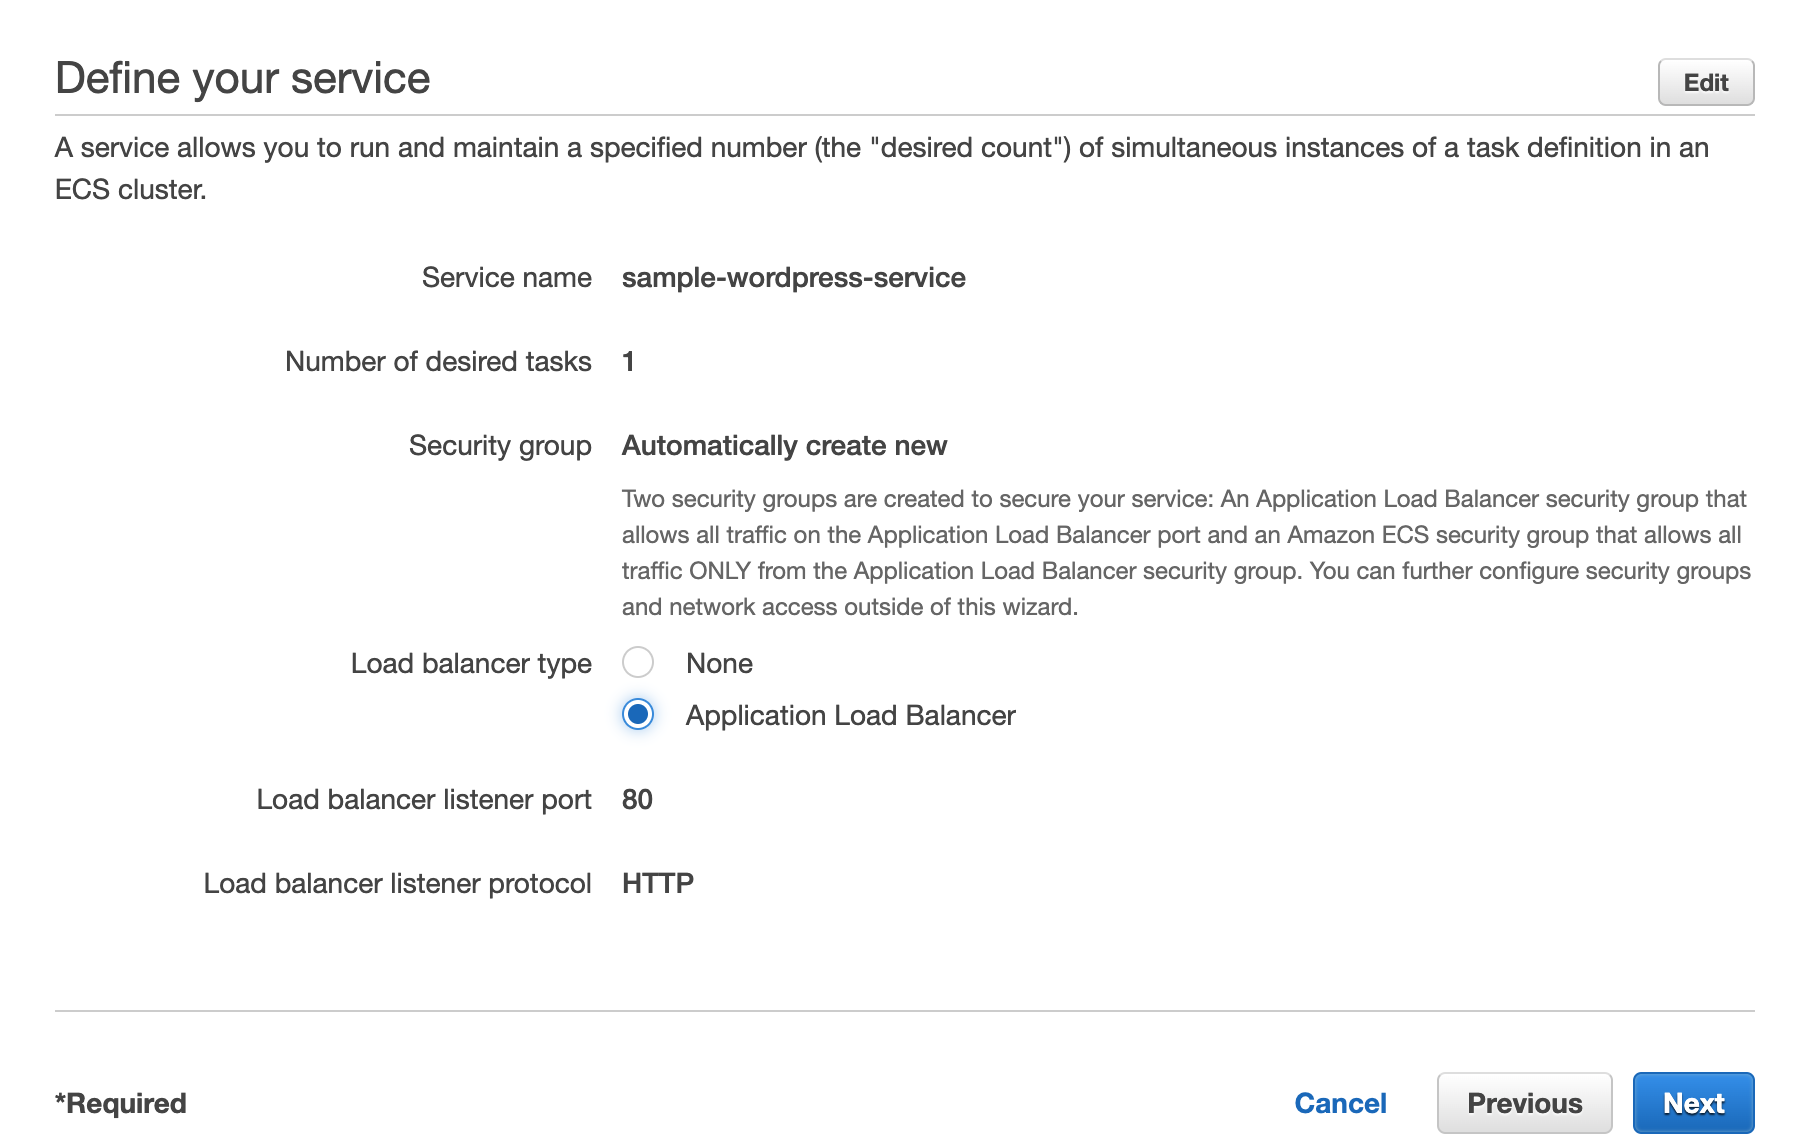
Click on next and select ALB mode.
Hit the create button and wait for final completion of creation.
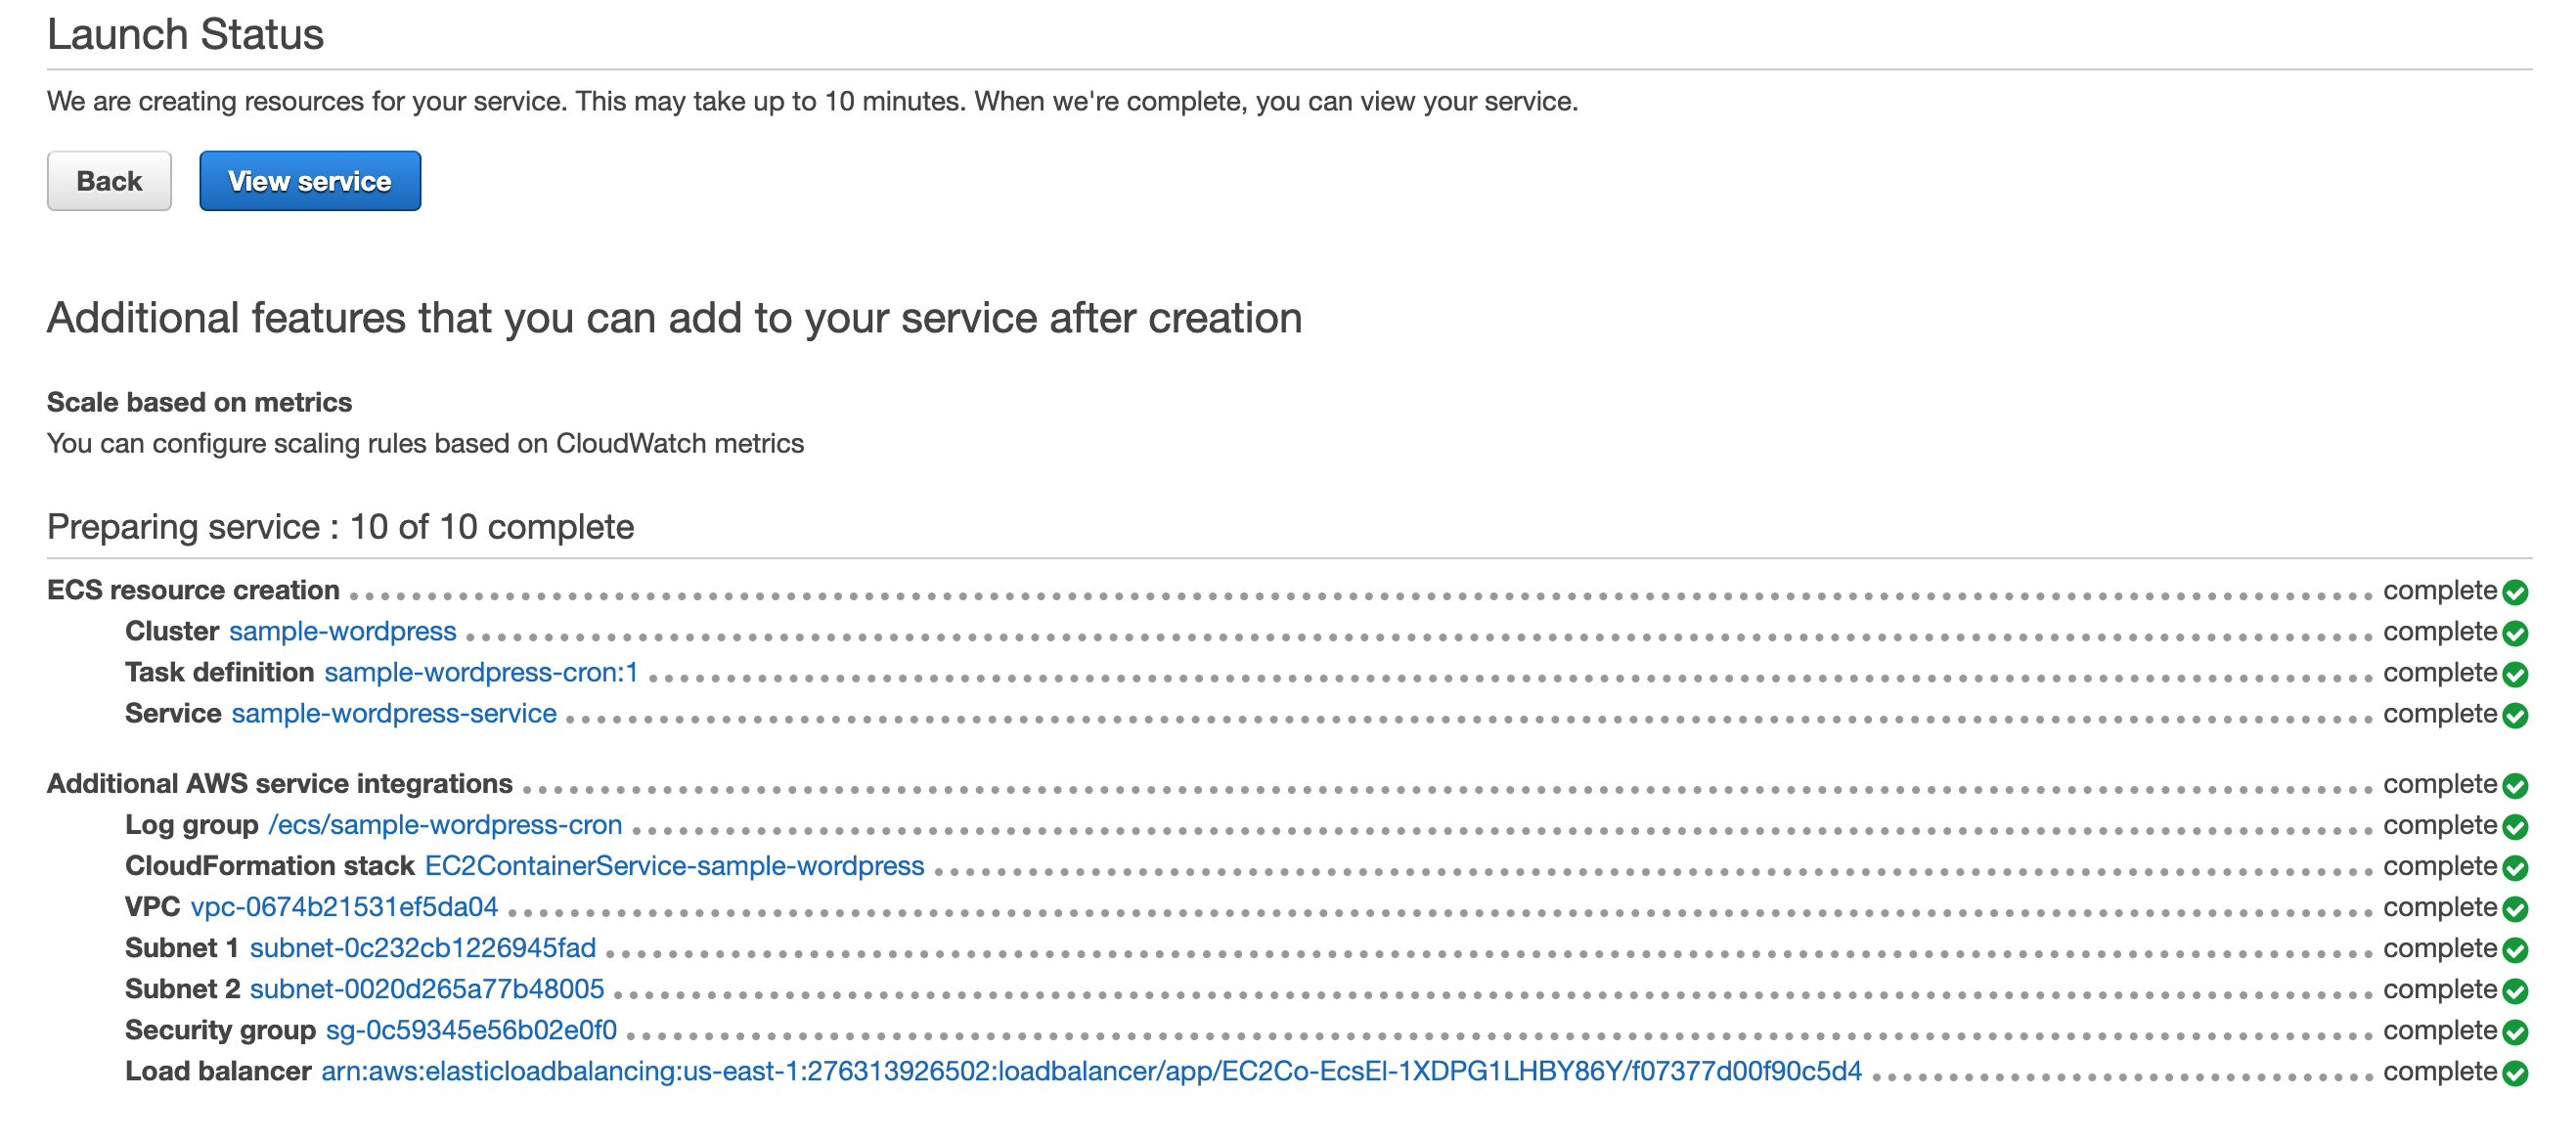
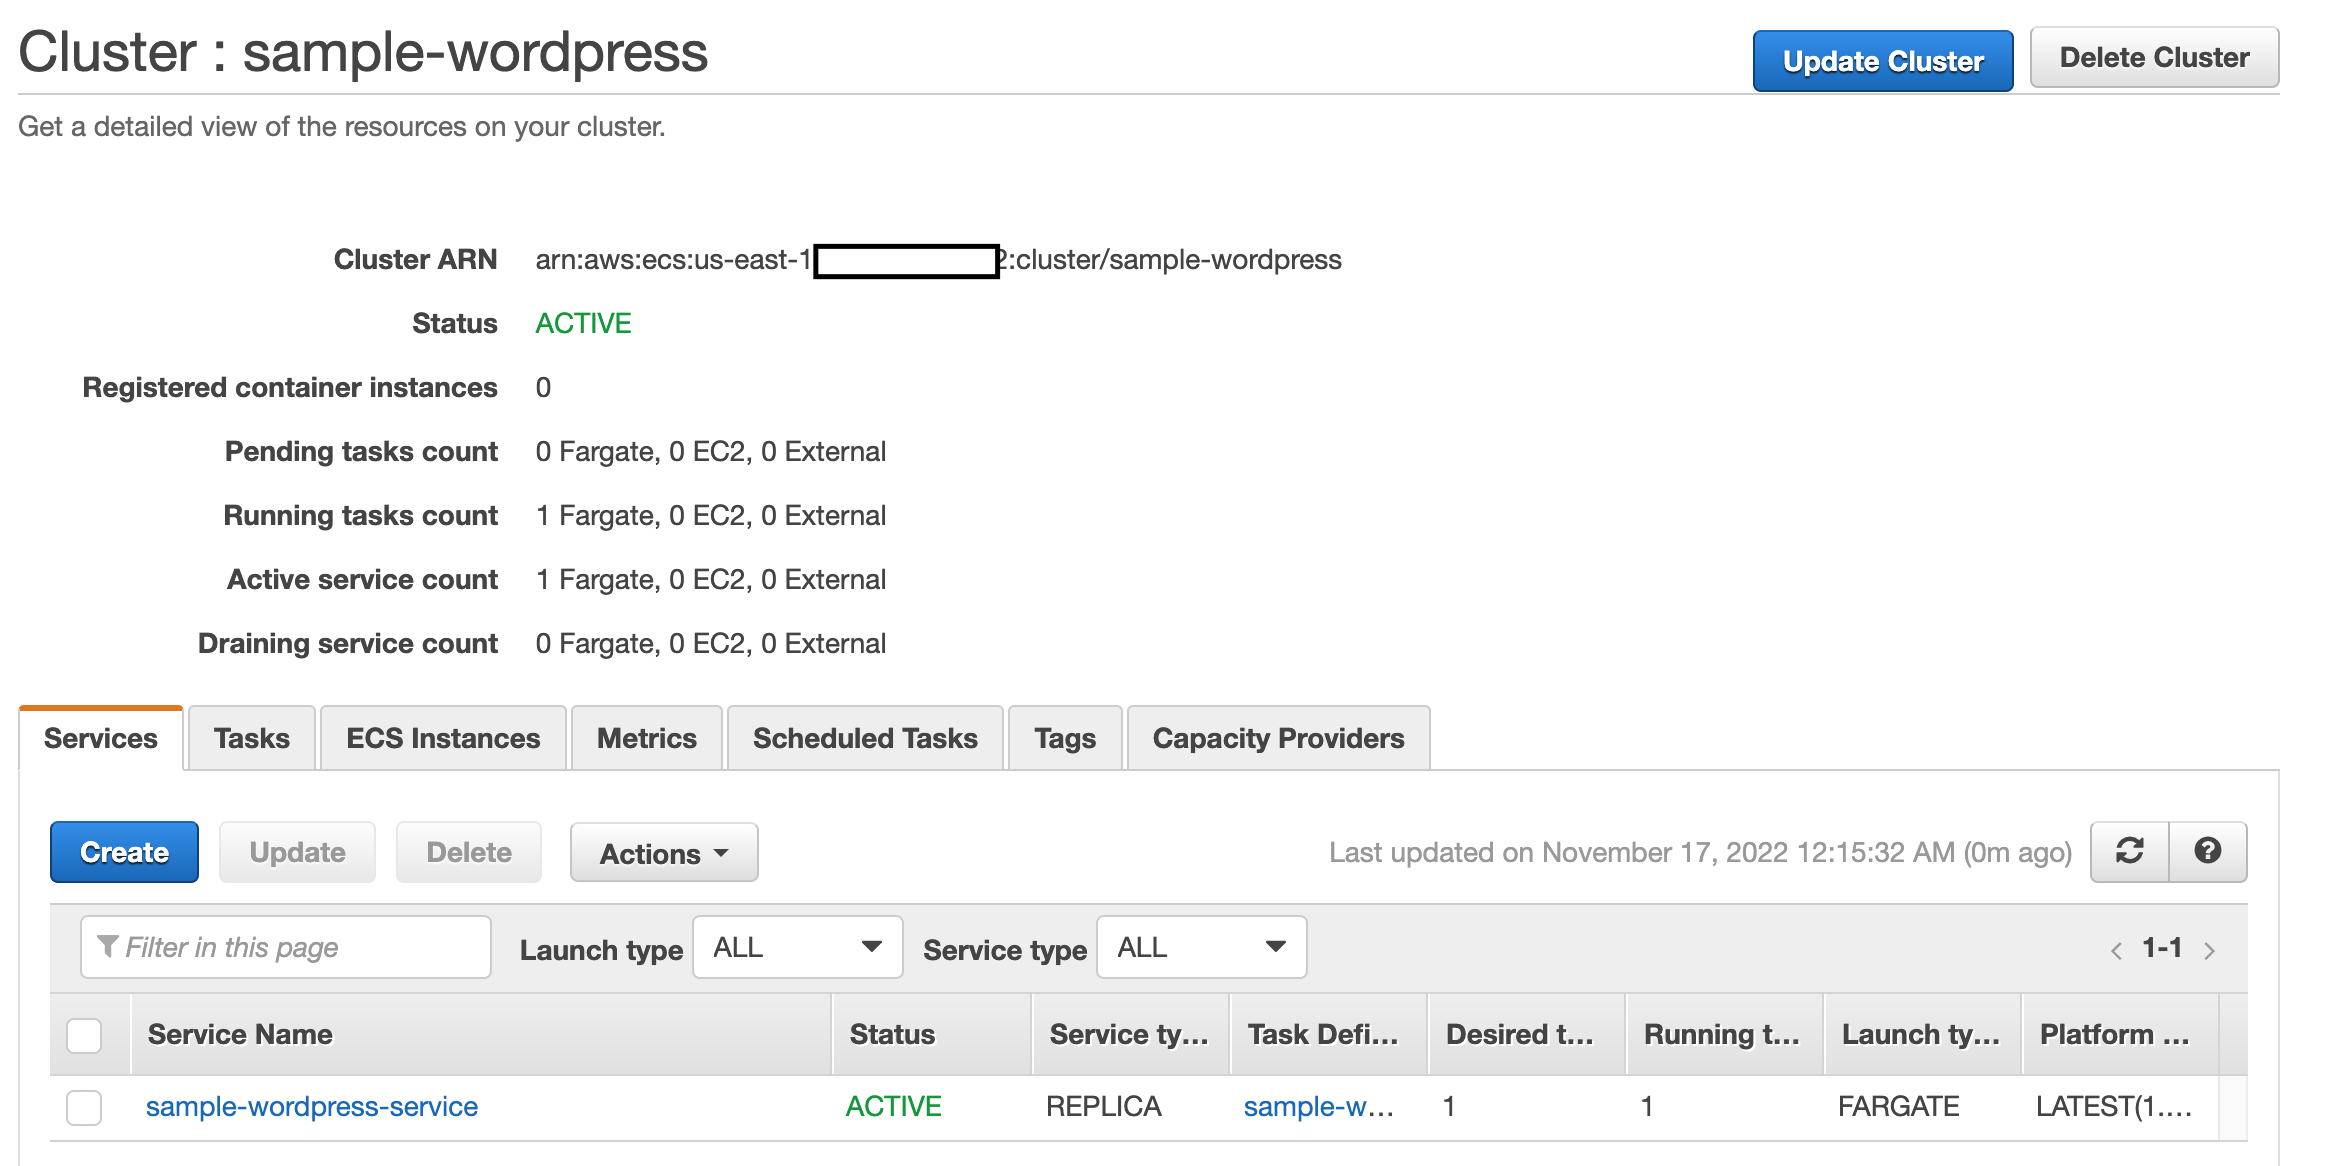
Once it finished all creation process it will show status like this
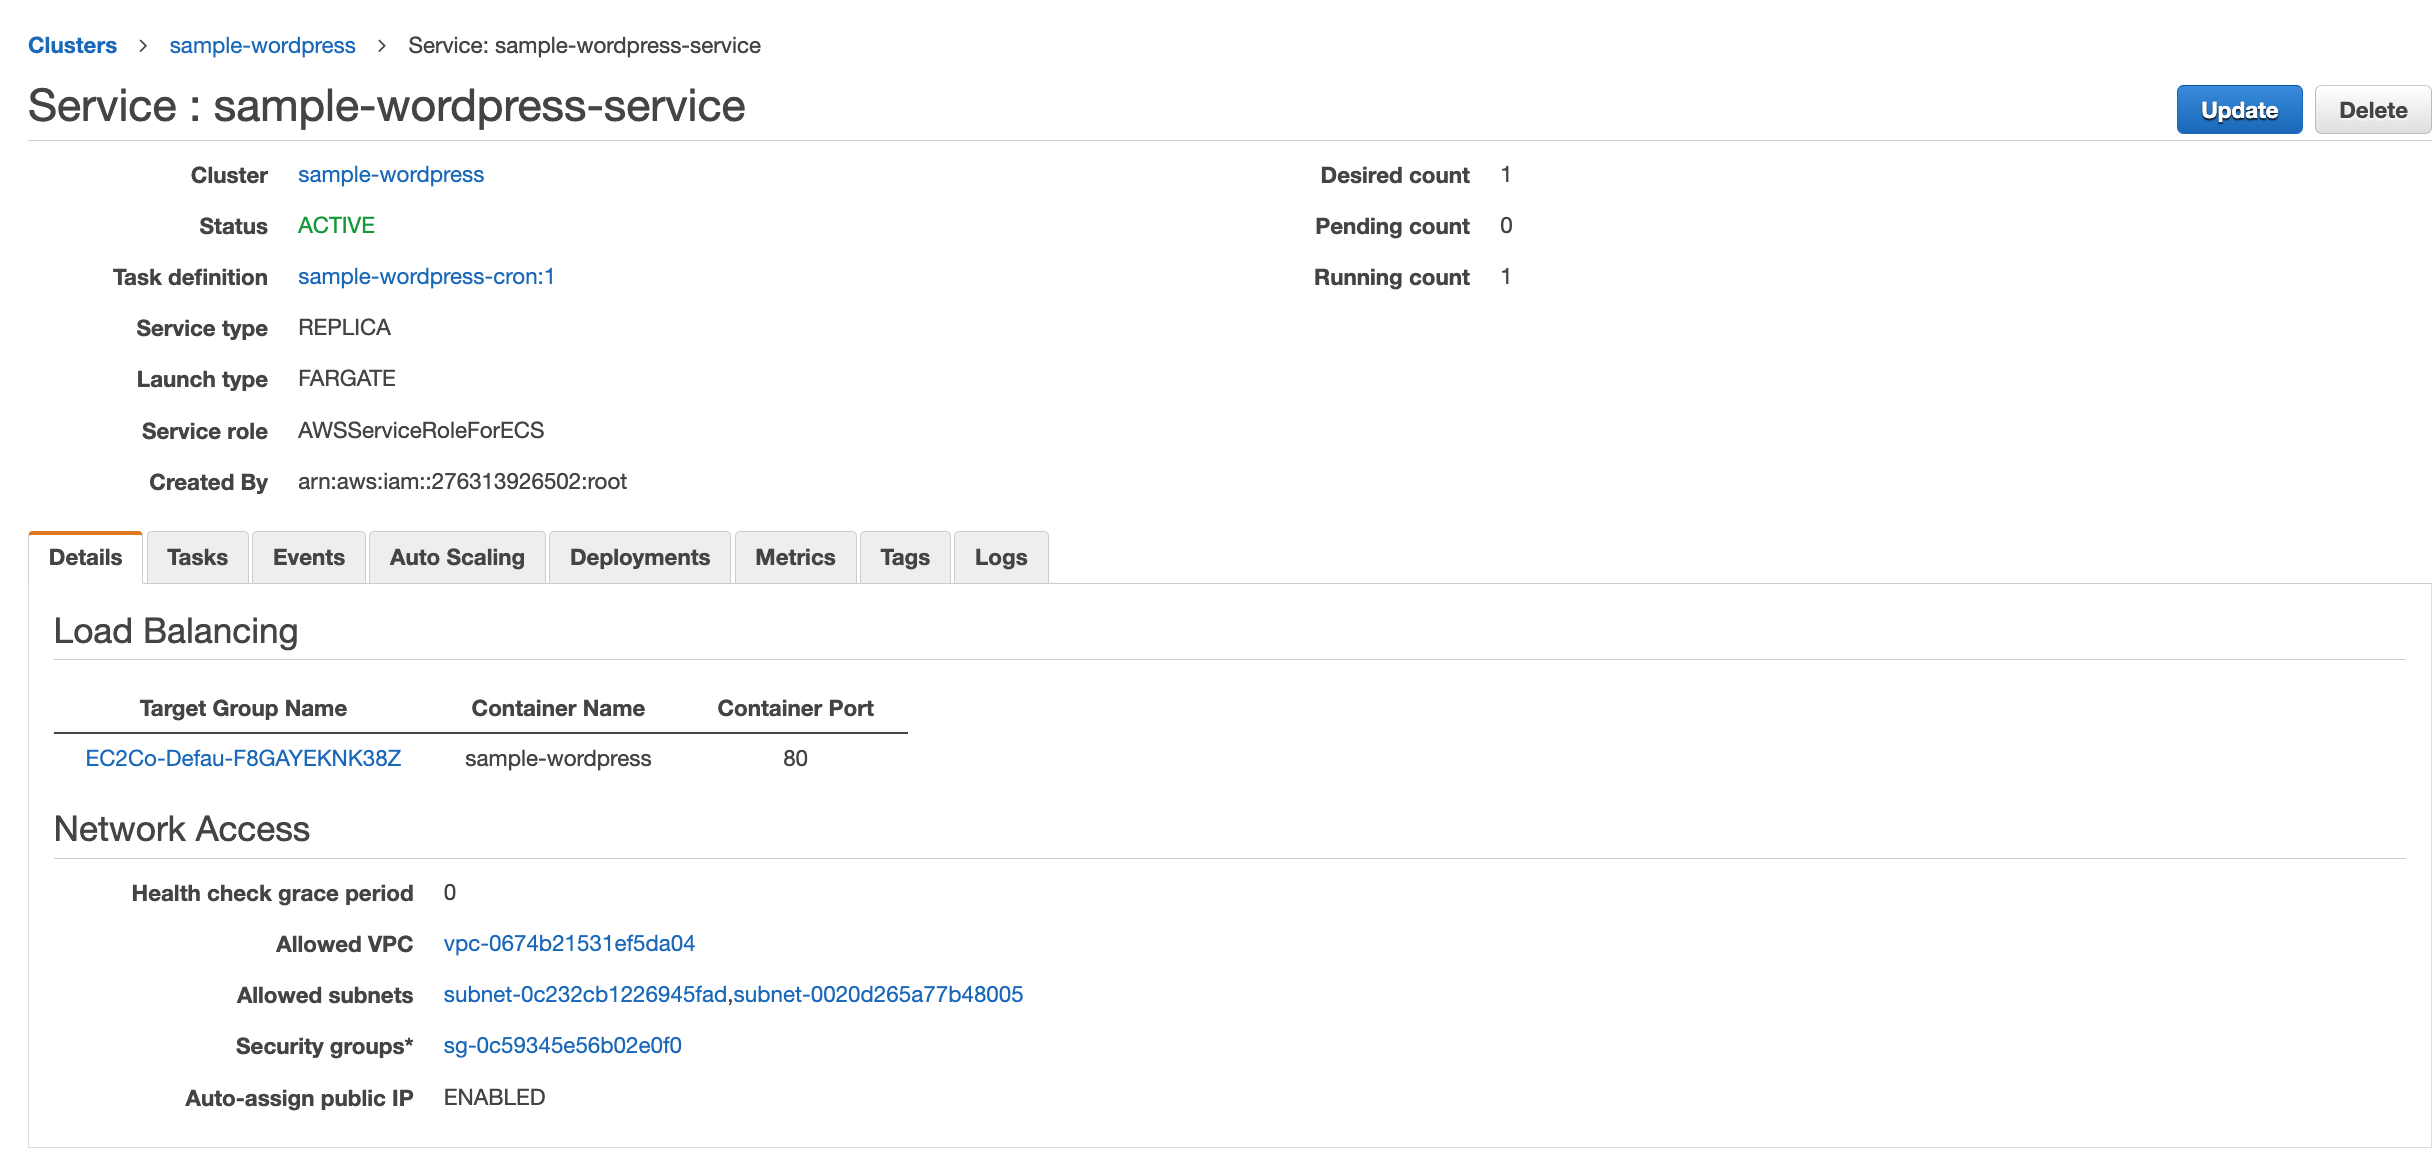
Now, click on view services. Review created service and their task.
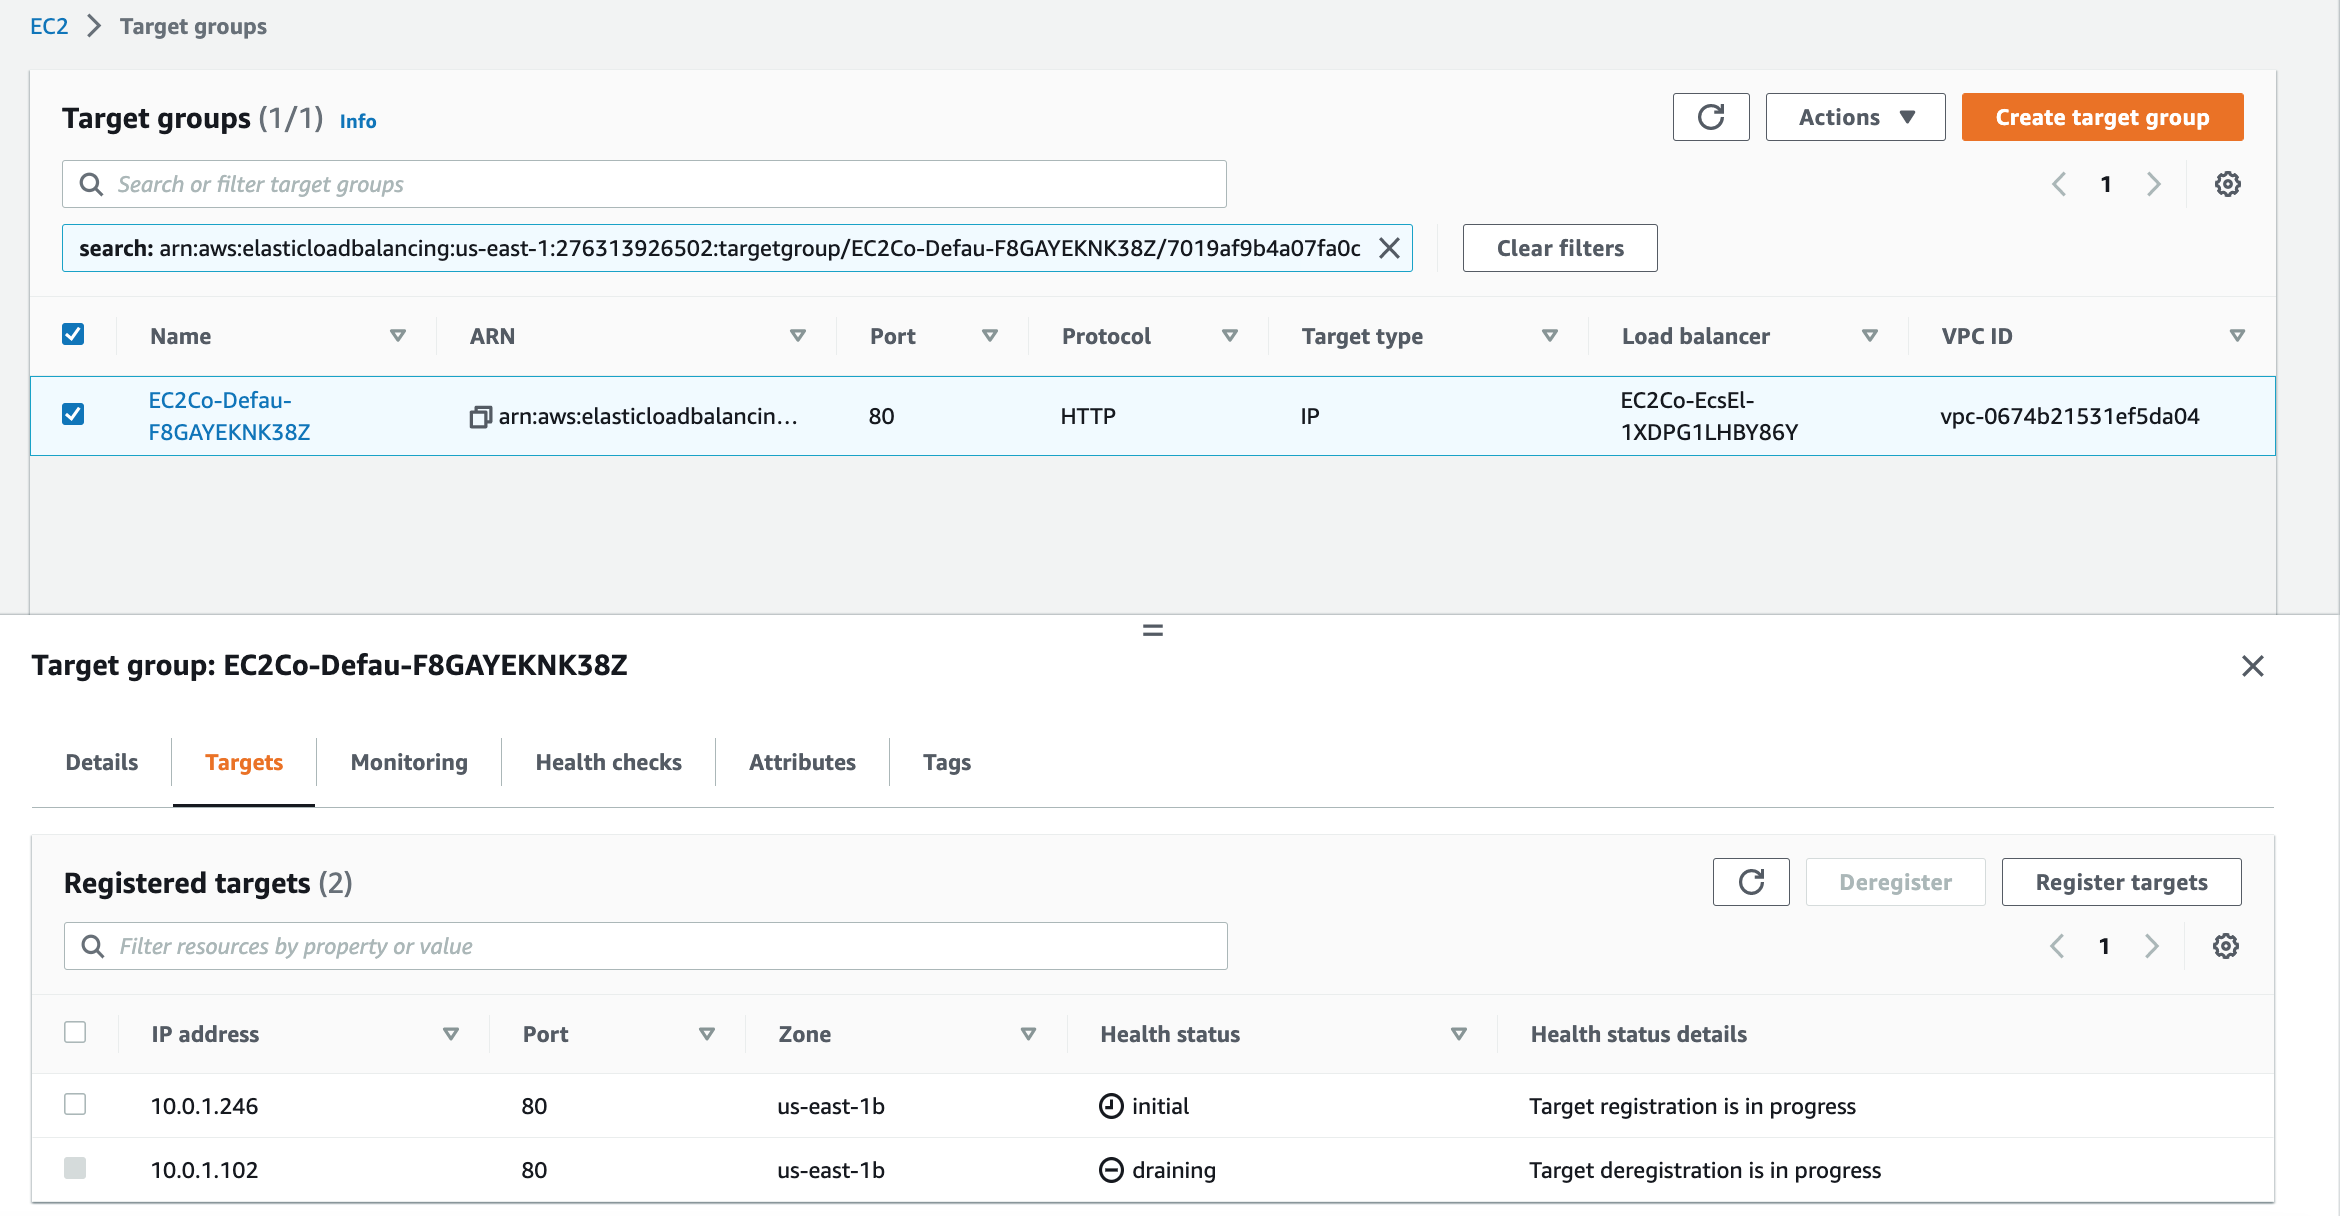
You can click on the target group and review its target group configuration.
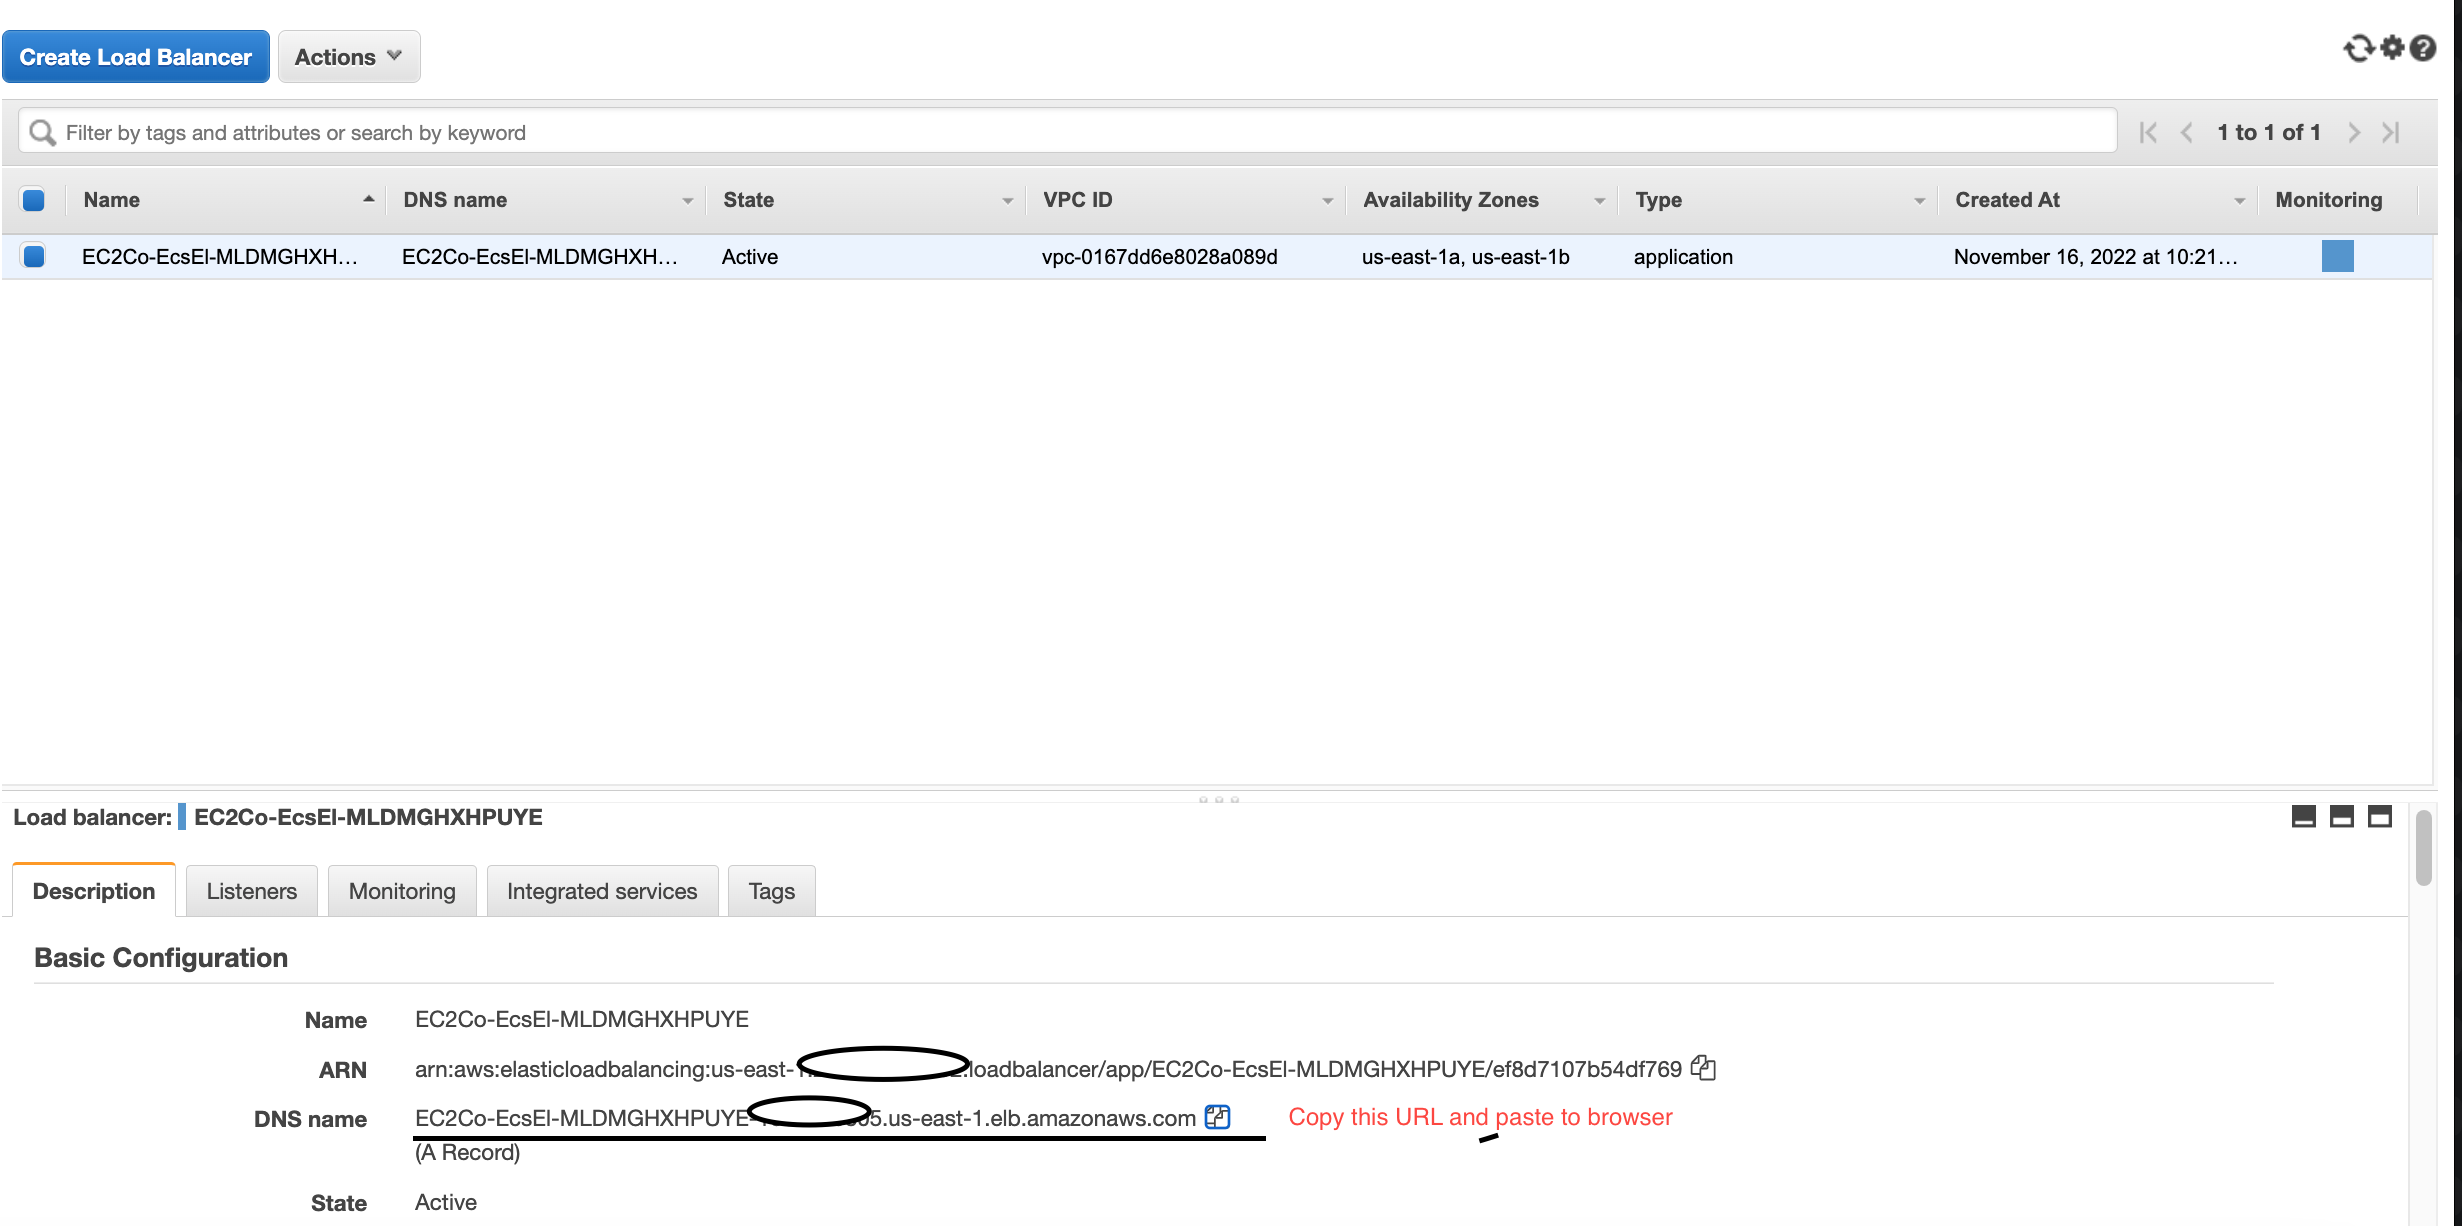
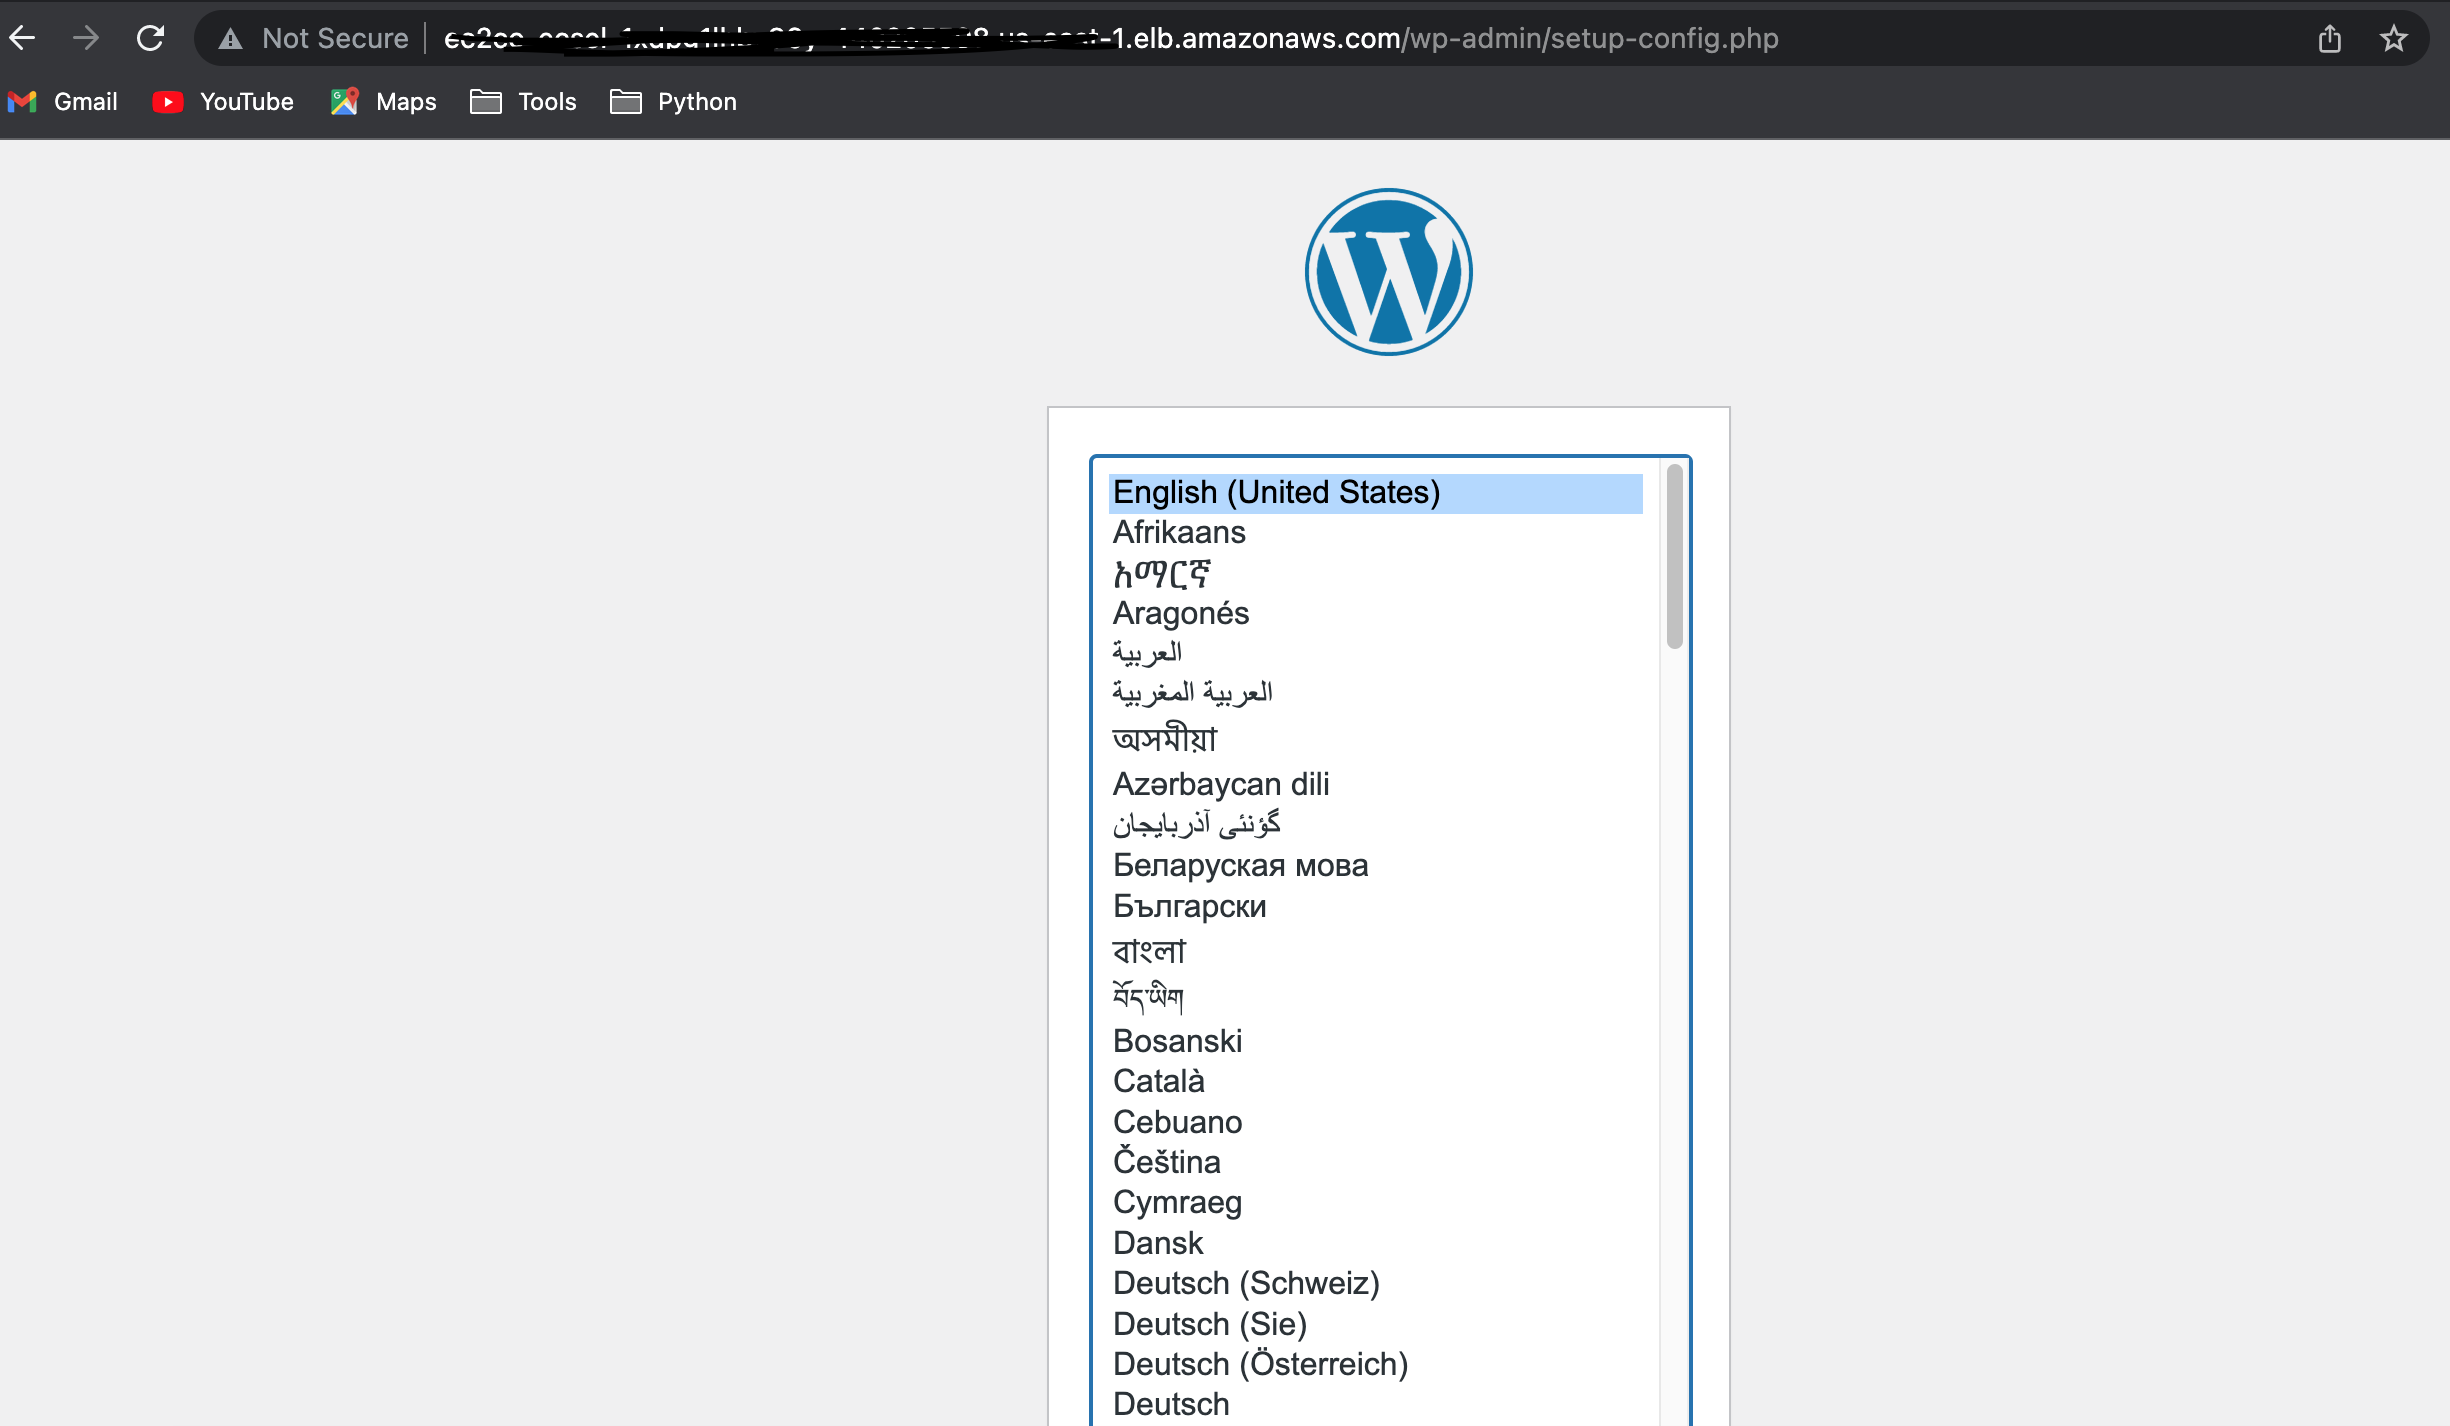
Step 6 : Find out URL to check WordPress website. Go to EC2 console -> Elastic Load balancer -> Copy URL
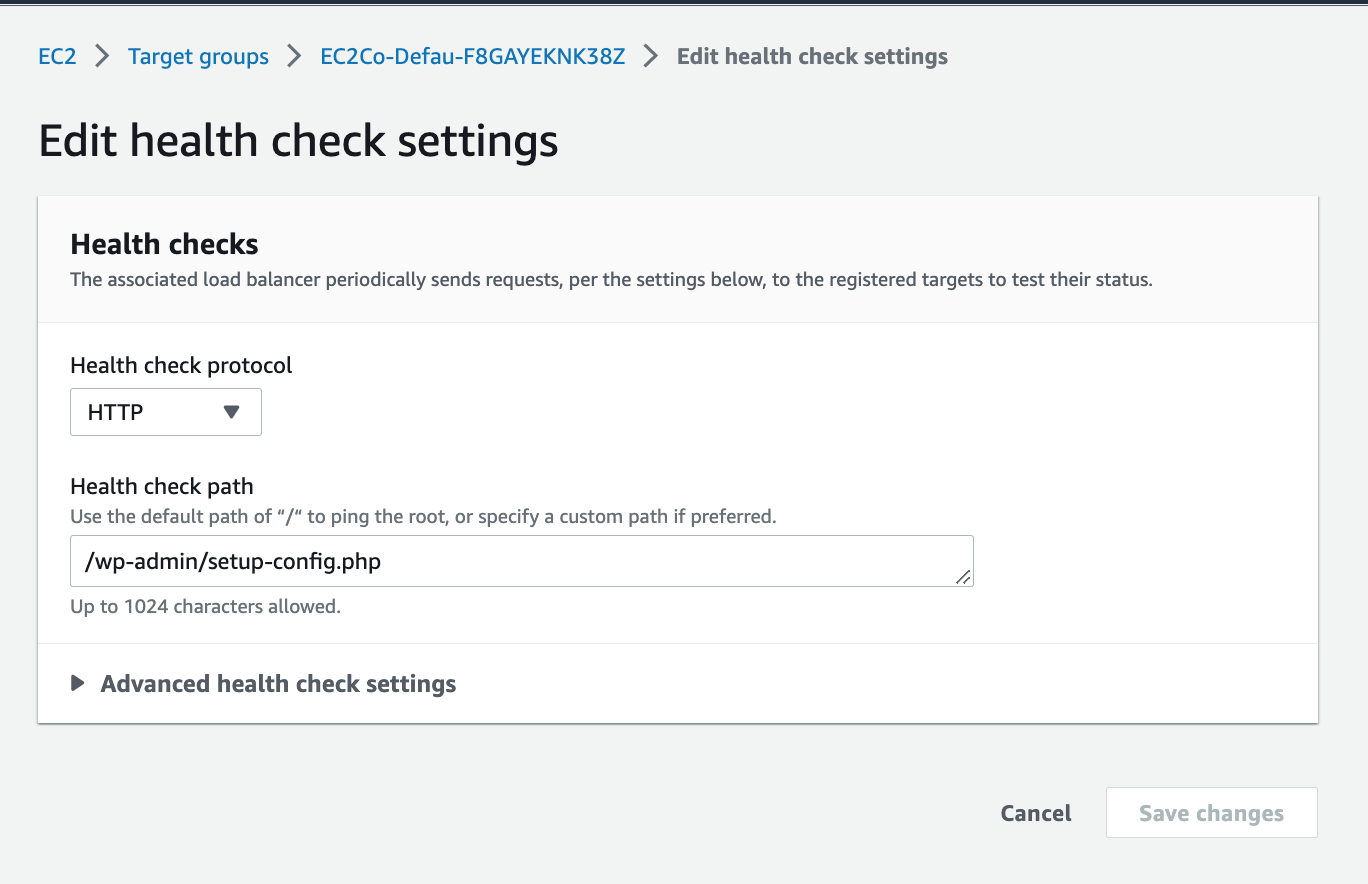
Note : You need to configure a health check URL to keep the task healthy. If you don't do this task will keep creating after going to an unhealthy state due to lack of health check URL. Temporary until WordPress installation finishes you can set
/wp-admin/setup-config.phpas a health check URL.This is just a WordPress setup. For running a full WordPress website you need to set up an RDS instance for database connection.
Finished!
If you find this article outdated then can watch this video.
I hope this blog helps you to learn. Feel free to reach out to me on my twitter handle @AvinashDalvi_ or comment in the blog. If you like my blog please don't forget to like the article. It will encourage me to write more helpful articles. Stay tune for next blog will come up different use case with ECS.
References :
- https://aws.amazon.com/blogs/containers/running-wordpress-amazon-ecs-fargate-ecs/